What are aspect ratios? How do they impact print sizes? And why do we need to know about them?
The aspect ratio of an image is simply the relationship between its width and its height. Ratios are written as width:height, with a : (colon) separating the values. You might also refer to this as the proportions of an image.
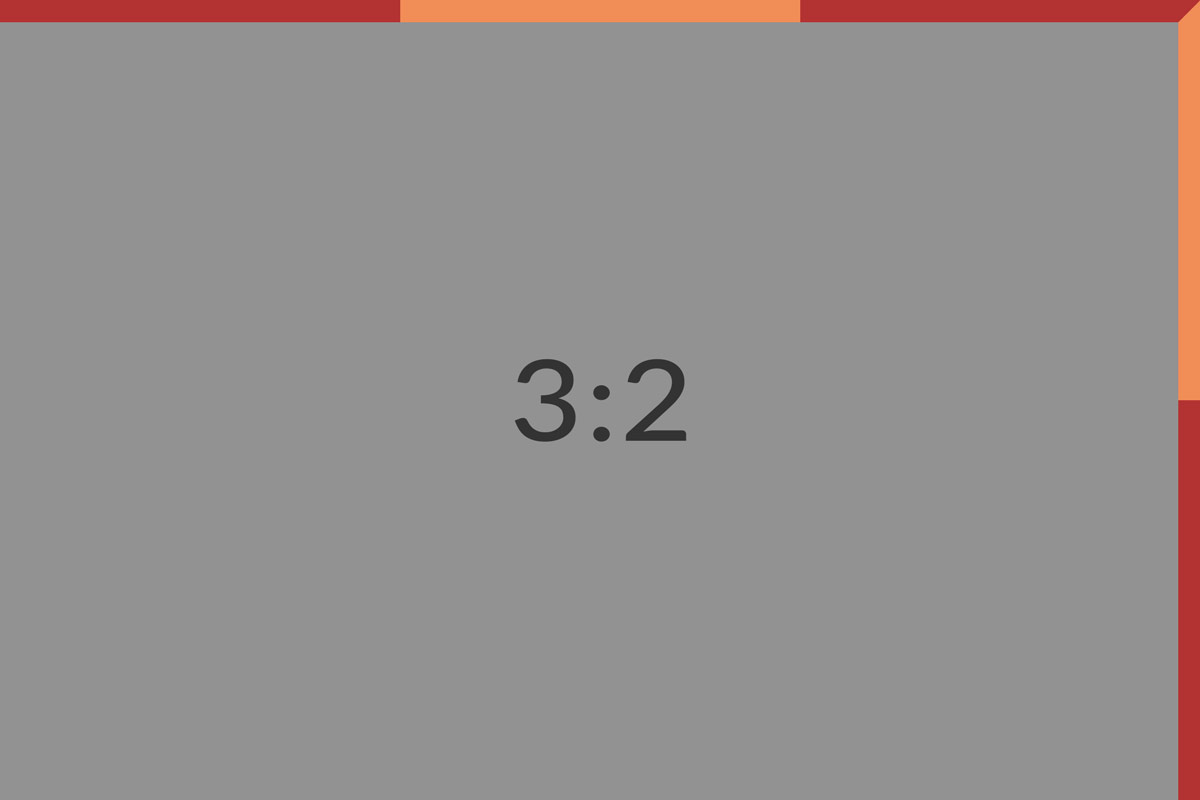
Most* 35mm DSLR cameras capture a 3:2 ratio. 3:2 means the image is a multiple of 3 units wide, and a multiple of 2 units high. For example, 3” x 2” and 6” x 4” are both 3:2 ratio.
WHAT DETERMINES A CAMERA’S ASPECT RATIO?
The aspect ratio of your image is determined by the ratio of the camera’s sensor or film frame, initially. Most DSLR cameras contain a sensor which is 3:2 ratio, the same as 35mm film. It should be noted that there are a few DSLR models on the market with 4:3 ratio sensors, capturing 4:3 ratio images by default.
(Note, some recent DSLR cameras offer variable aspect ratios via a camera menu. When a user changes aspect ratio in-camera, the camera is essentially cropping the image. Consult your camera manufacturer about this.)
WHY SO MANY PRINT RATIOS & SIZES?
Since the dawn of photography, cameras have been built to suit many different film ratios. Whilst many of us began with 35mm film (3:2 ratio) being the most common format, both it and single lens reflex cameras (digital or film), are relatively young format in the world of professional photography.
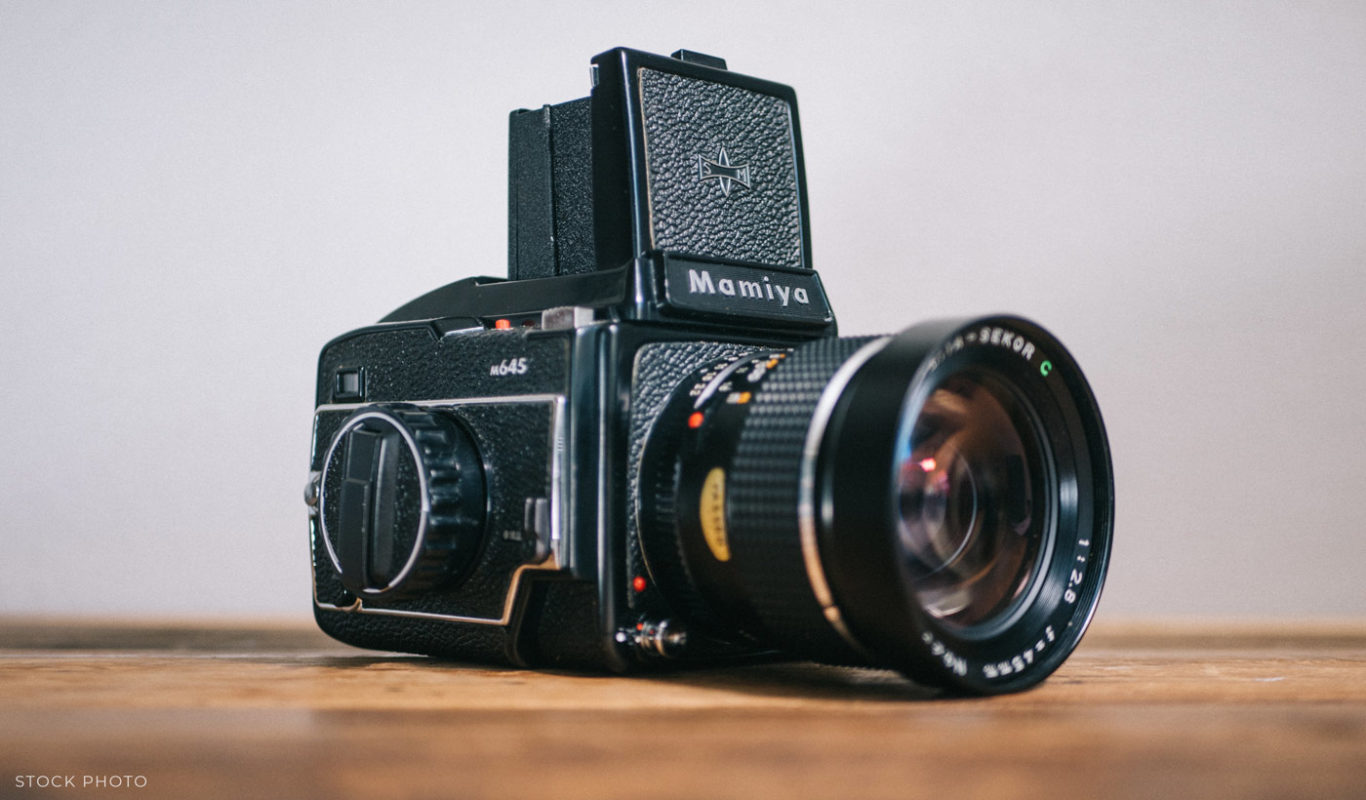
Prior to this, medium and large format cameras were more the domain of professional photographers. Medium format cameras (think Bronica, Mamiya, Hasselblad) commonly used film sizes 6×4.5cm (4:3 ratio), 6×6 (1:1), 6×9 (2:3), 6×7 (6:7) and 6×17 panorama. Large format cameras, popular from the 1830s through to the 1960s, and still used today, used larger film, often 5×7″ (5×7 ratio) or 8×10″ (4:5) sheets.
This is a very basic overview of the history of cameras and aspect ratios, but it’s important to have an awareness of where our craft came from, and why the print and framing services offer such a range of size options.. because they’ve existed for over 100 years.
AND these medium and large formats are STILL USED TODAY, often with digital backs instead of film. Watch this unboxing video from Hasselblad to see the components of a medium format camera with digital back.
FYI most smartphone cameras contain a sensor which is 4:3 ratio. This is why the images from your smartphone and DSLR are different ratios!
WHY DO WE NEED TO UNDERSTAND PRINT RATIOS?
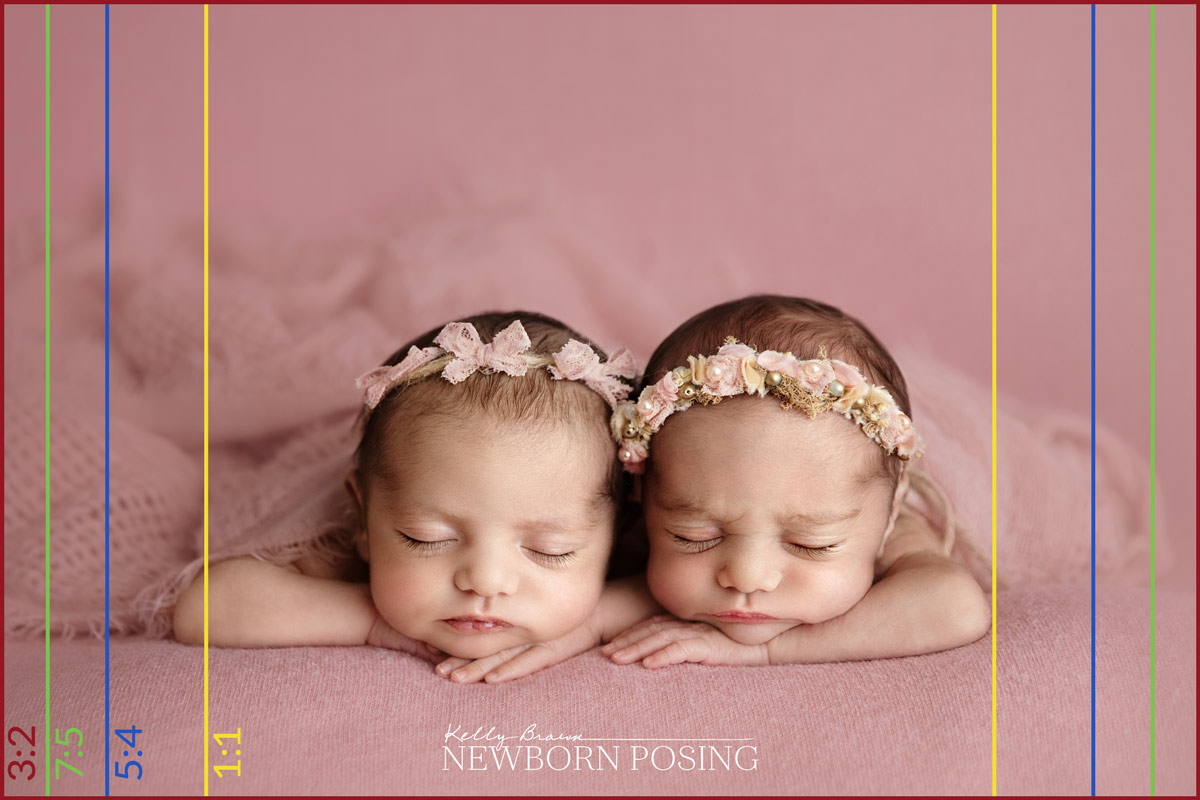
While most DSLR cameras capture 3:2 ratio, not all common print sizes share this same ratio. Common print ratios are 3:2, 7:5, 5:4, and 1:1.
If the ratio of the requested print is different from the ratio of the camera which captured the shot, the image will need to be cropped. So, some of the image area will be lost.
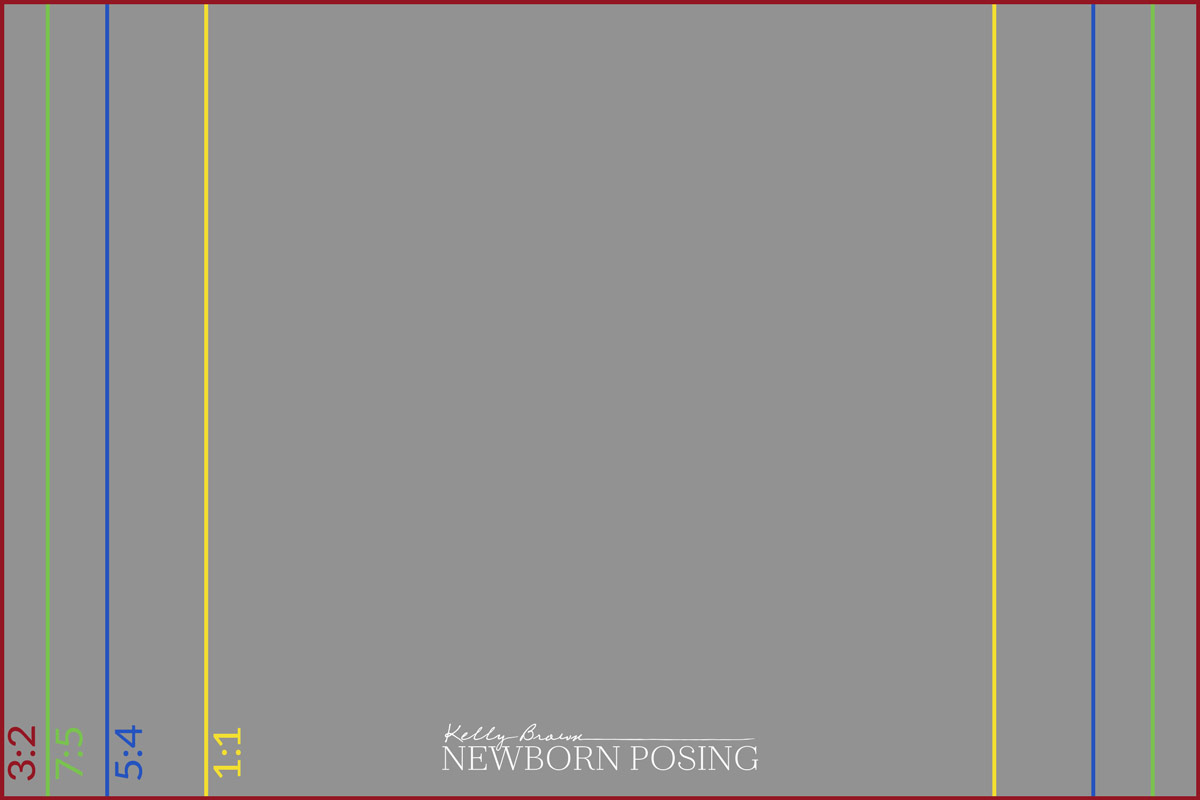
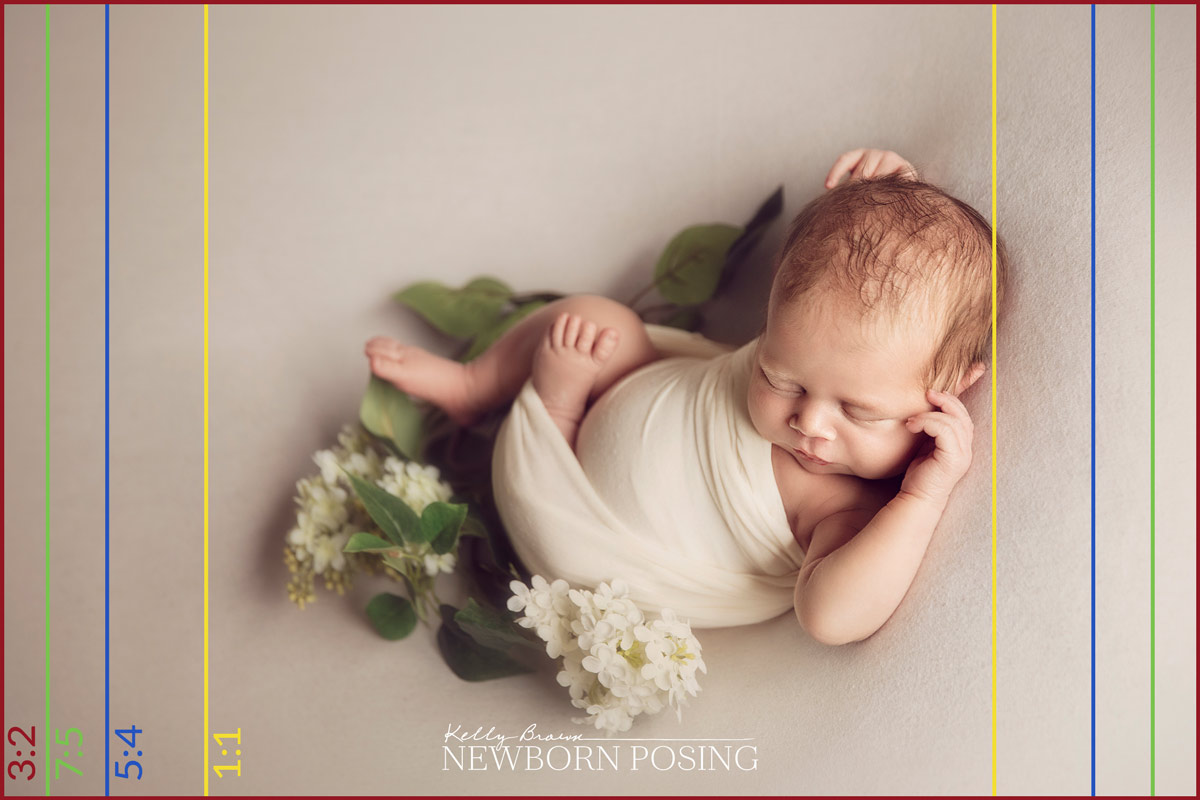
The diagram below shows an image captured at 3:2 ratio. The overlays show the amount of image which would need to be cut off to produce a print of a different ratio. By being aware of these common print ratios, we can take them into consideration when composing our images in-camera. This allows us greater flexibility for final print and album design options.
COMMON PRINT SIZES
The graphic shows popular print sizes for the most common aspect ratios.
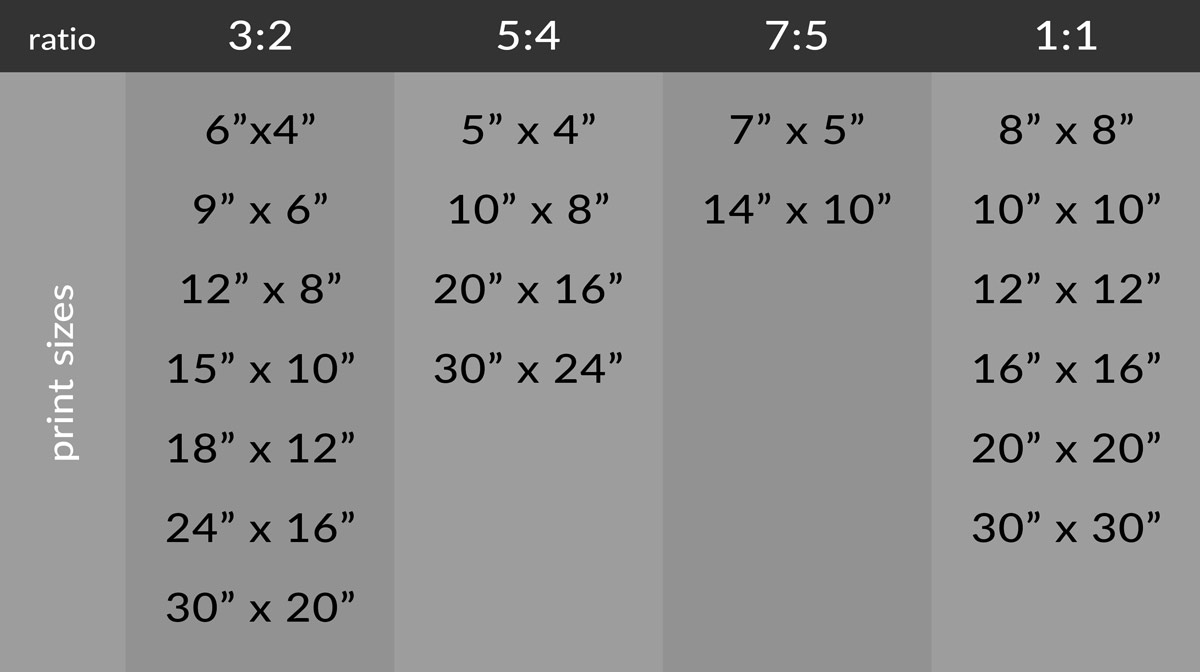
You don’t need to offer all of these print sizes. In fact, we recommend you limit the number of options in your product guide to a small range, rather than overwhelm your client with too many choices. You can always provide a custom quote from an “office-only” pricelist, if they have a special request.
CROPPING DURING EDITING
When editing, stick to the standard 3:2 crop as much as possible. Freehand or random cropping ratios are often problematic, creating limitations on the print sizes you are able to offer your clients.
So the best approach is to compose strongly in camera, mindful of common print ratios, and do minimal cropping using the default 3:2 ratio in post-production. You can learn more about composition and filling the frame in Kelly’s Getting It Right In Camera tutorials.
Sticking to standard 3:2 ratio crops will allow you to:
- offer the popular corresponding image sizes without losing any of the image (6×4″, 8×12”, 12×18″, 16×24”, 20×30”)
- create feature pages in a popular 12×8” album size, with an edge to edge image
- having the full 3:2 frame provide greater options; other ratios provide limitations
Non-standard crops can also be problematic for album design. Inconsistent crops within a gallery also make album design more time-consuming.
EDUCATING CLIENTS – Aspect ratios and print dimensions
Clients who purchase digital collections may find the print ordering process frustrating if they’re unaware of the variety of print and frame ratios. Sometimes this frustration can turn to “blame” on the photographer.
Educating your client upfront is the best solution, to provide clarity.
Prepare a visual such as this image displaying the potential print ratio crops. Before their session, ask your clients whether they have existing frames they are planning to fill or existing print sizes from previous sessions they are wanting to match. This will help guide you in creating their gallery for maximum flexibility.
Let them know that print kiosks and online services may apply the crop in a less than ideal position, and they may lose important features. By offering prints to your clients, you provide professional advice, archival quality, and the result they want, every time.
Ger Long says
Hi there,
I am wondering with aspect ratio in mid if I want to print square what do I do??
Thanks in advance!
Ger Xx
Michelle K says
Hi Ger. To ensure control over where the image crops, it’s best to do the crop yourself. So in Photoshop/Lightroom, set the crop tool to 1:1 ratio (square); choose where to crop; and save a COPY to print square. If you want the option to print full frame and square, remember not to save over the original full frame image after you crop! We suggest creating a Print Job folder and always saving COPIES at the sizes to suit your print order in that folder.
Geraldine says
Oh this is so bizarre. I read this lastnight, and as I am only starting out I was unaware of this.
Just now I have received an email from a client who tried to print square today from a shoot last month.
Does anyone know how to change it so she can print square, I don’t yet print myself but I am working on this.
Ger Xx
Michelle Pena says
Do you apply the ratio in camera ? Or the 3:2 is in PS itself ? This has always confused me !
Michelle K says
Hi Michelle. To maintain the 3:2 ratio my camera captures by default, I set my crop ratio to 3:2 in PS also – unless I have a specific need for a different ratio of course.
If your camera offers variable ratios however, you will need to consider what best suits your shooting style and products. Either way, I would suggest setting your crop ratio in PS so that you produce a gallery which is consistent.
Ana-Maria says
I never understood this, and quite often got frustrated when PS wouldn’t let me crop the way I wanted. Not to mention when my prints looked off. Thank you so much! This helps tremendously
Maria Fonseca says
Something I have never quite understood. Thank you.
Robyn brady says
This was an awesome article and guide to cropping. Thank you so much for making this a clear and understandable concept.
Irene Salek-Raham says
Awesome info for us to pass on to clients. Thank you!
Robert says
Usually I stick to the 3:2 ratio, but sometimes it’s not ideal for particular shots.
Thank you for pointing this out, on the same hand, I wonder if there is a template available with these ratio options and helplines?
Thank you Kelly!
Heather says
great article – something I’ve always struggled with – editing and ending up with images cropped that dont fit prints