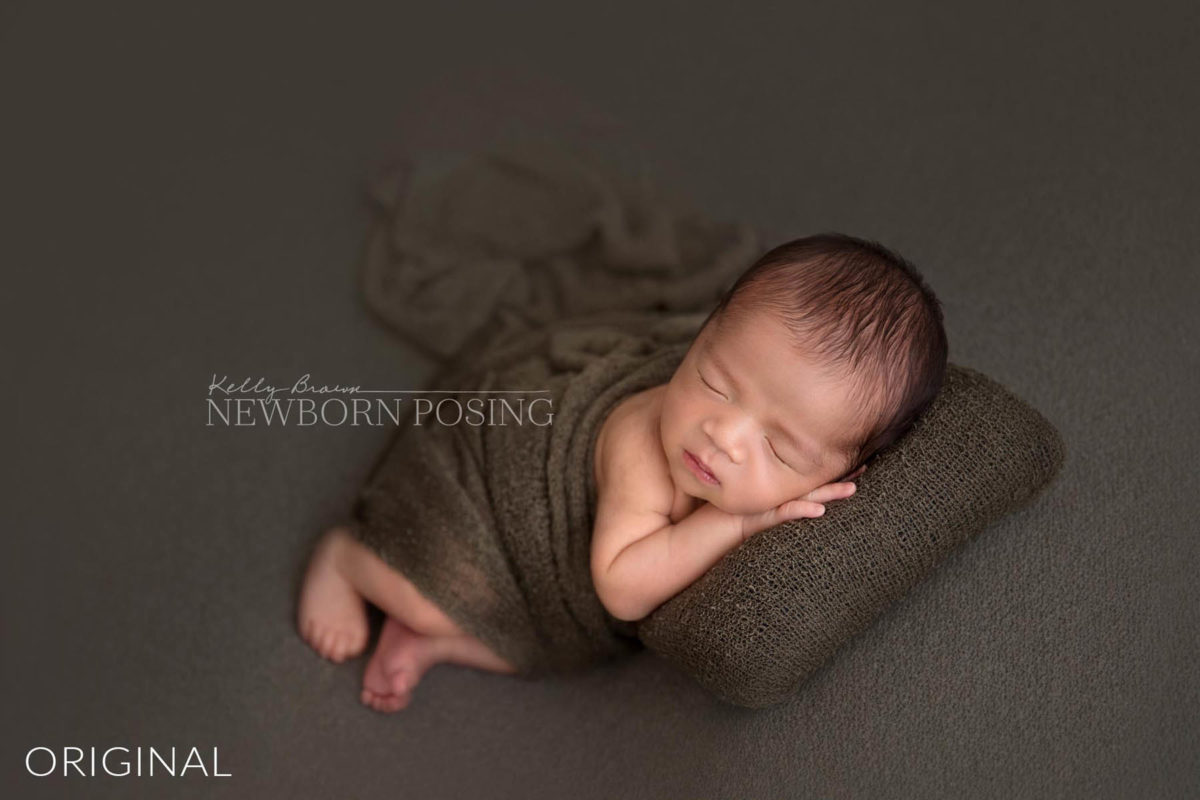
Change the colour of props, wraps, outfits and more in Photoshop or Photoshop Elements with this easy to use Colour Change Action from NewbornPosing.com Simply play the action, choose your custom colour, and paint on the colour change in the required areas. You can even adjust the density to make the colour change lighter or darker if required.
JUMP TO HIGHLIGHTS
– Required Skills
– Colour Change Action tutorial
– Applying Layer Mask
WHEN TO USE A COLOUR CHANGE ACTION
- Change the colour of any or all props or outfits in your image
- Match the colour of an item to other colours in your image – or even to colours in a different shot
- Modify your images to create a harmonious colour palette, where the baby stands out as the focus
- Whenever you’re unable to achieve as many outfit or set changes as hoped, create extra variation in your client galleries with a quick post-production edit
- Use the Colour Change action within your editing workflow to help correct stains or blemishes
WHICH IMAGES WORK BEST WITH COLOUR CHANGE?
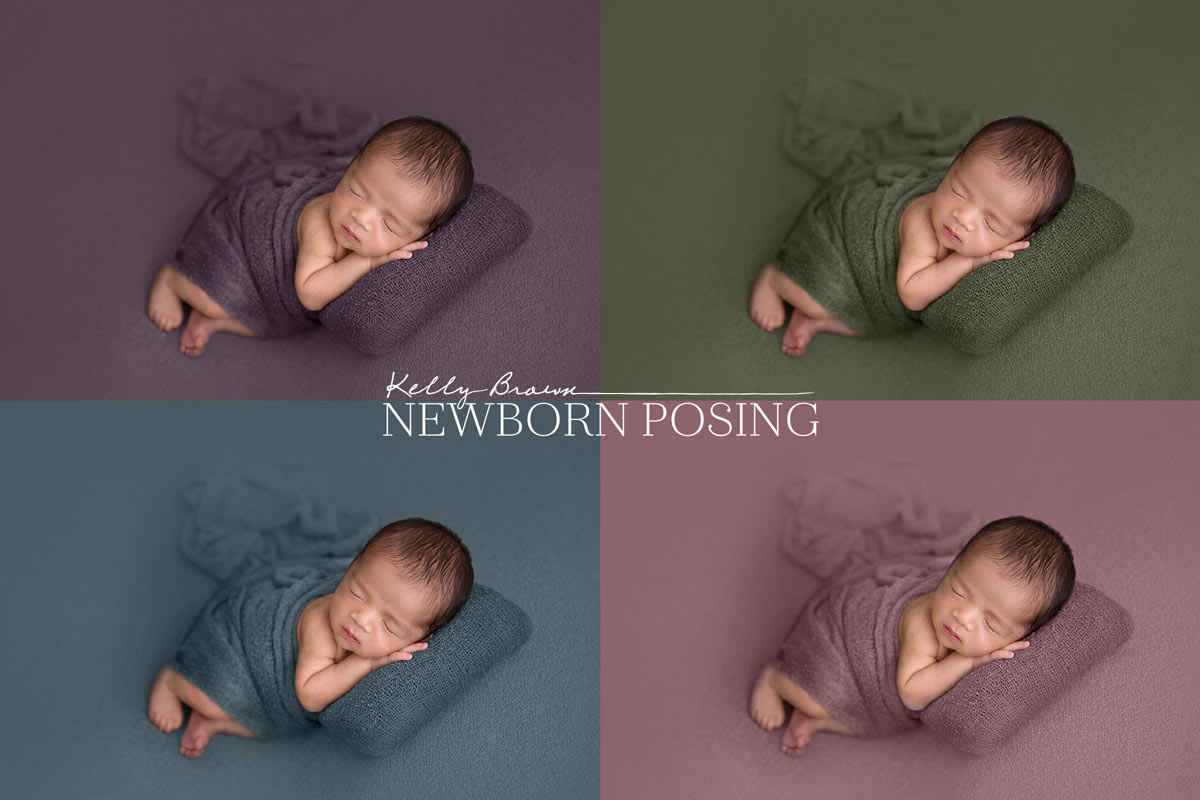
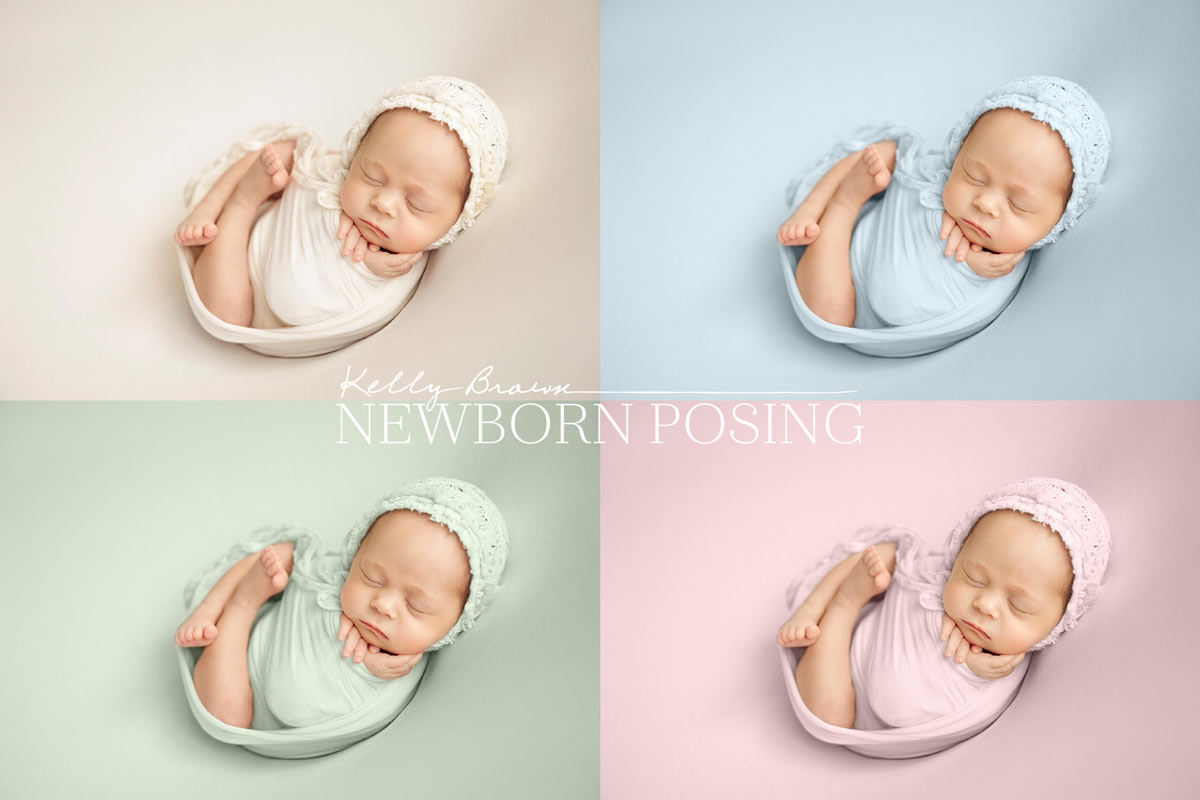
- Colour change works best on images with a decent amount of density
- You may struggle with very light images, if there is not enough density to pick up the colour change
- If you are shooting with the intention of changing colours in post, opt for mid-tones, or tones similar to your ideal final result
- Note the 2 grid examples we’ve included in this post. While we’ve changed density a little, we’ve avoided going to extremes. The darker image (above) offered a lot more latitude for changes in colour and density, while the lighter grid (below) was limited to pastels in a similar density to the original cream image.
As a newborn and portrait photographer, noone expects you to have every colour of the rainbow available in your wardrobe and prop collection. Firstly, it’s impractical for most small business owners to store that volume of outfits, wraps, throws and so on. And secondly, it’s costly! Here’s where the Newborn Posing Colour Change Action can save you!

SKILLS REQUIRED TO USE THIS ACTION
Very few! After running this action you’ll need to select the brush tool and modify its size, edge hardness and opacity.
A basic understanding of Photoshop layer will be useful. If you’re new to Photoshop, we can recommend Kelly Brown’s Photoshop Editing Fundamentals class.
You’ll also need to understand Layer Masks to hide and reveal the parts of the colour change layers as required for each image. See our free article, “How to Use Layer Masks in Photoshop”.
CAN I USE THIS ACTION ON SKIN?
Technically yes, but don’t go crazy! The goal of skin work is to ensure you don’t end up with a very flat / monochrome looking patch of skin.
Pay close attention to the opacity at which you paint the action on after selecting a skin tone for your colour change. Look at your own skin. You’ll likely see some variation in tone and density. Keep this in mind when applying the action and avoid painting one colour on heavily. Start with your brush opacity low, eg. 10-15%, and apply until you achieve a realistic effect.
This action can be used in conjunction with Kelly Brown’s All in One and Beautiful Skin & Details Action Sets, as part of your complete retouching workflow.
USING THE COLOUR CHANGE ACTION – STEP BY STEP
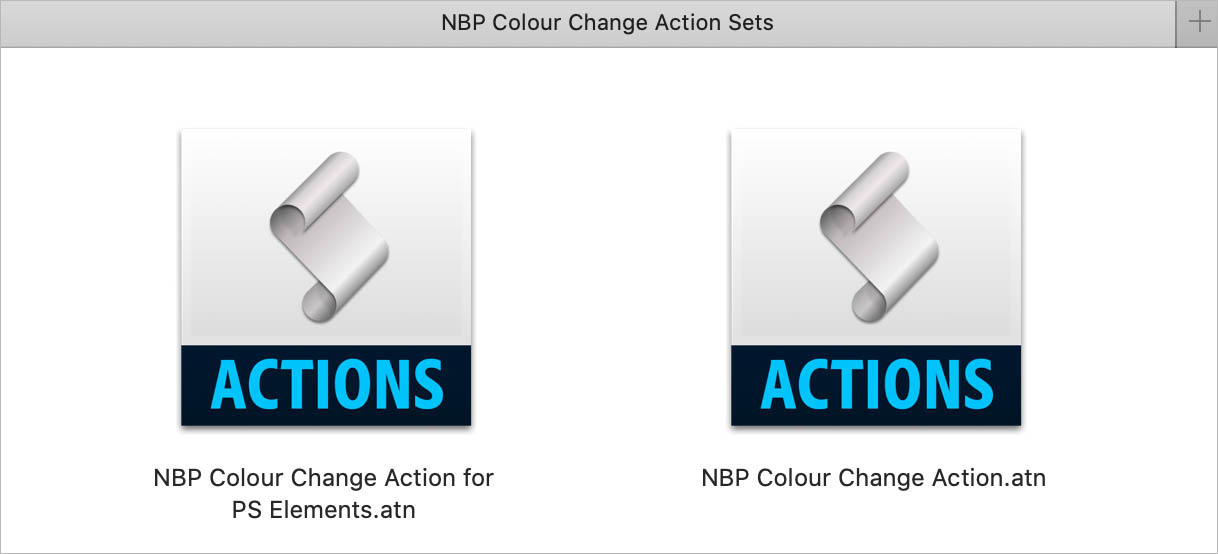
After purchasing the action, load it into your Photoshop or Photoshop Elements application, open an image, and press play on the action. The action will create a layer group containing 3 adjustment layers. The screenshots below demonstrate how to adjust these layers and use the layer group mask to apply the colour change.
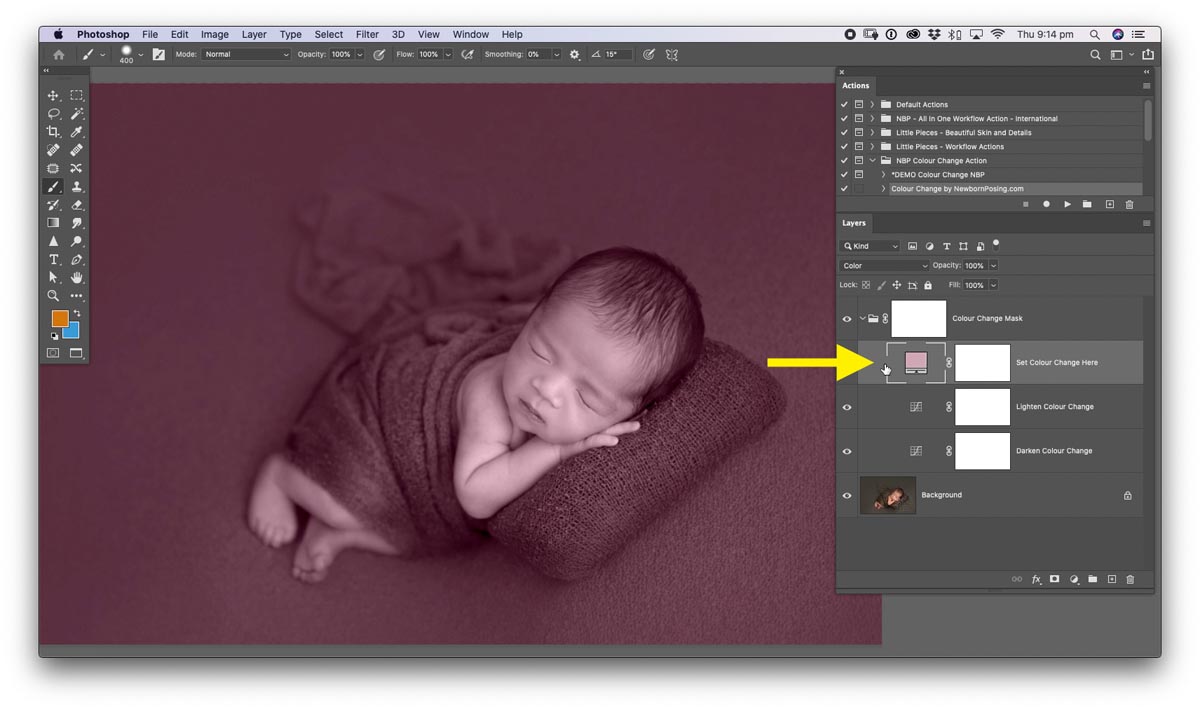
- The action creates a layer group containing 3 adjustments. Double-click the colour icon on the first layer, titled “Set Colour Change Here”.
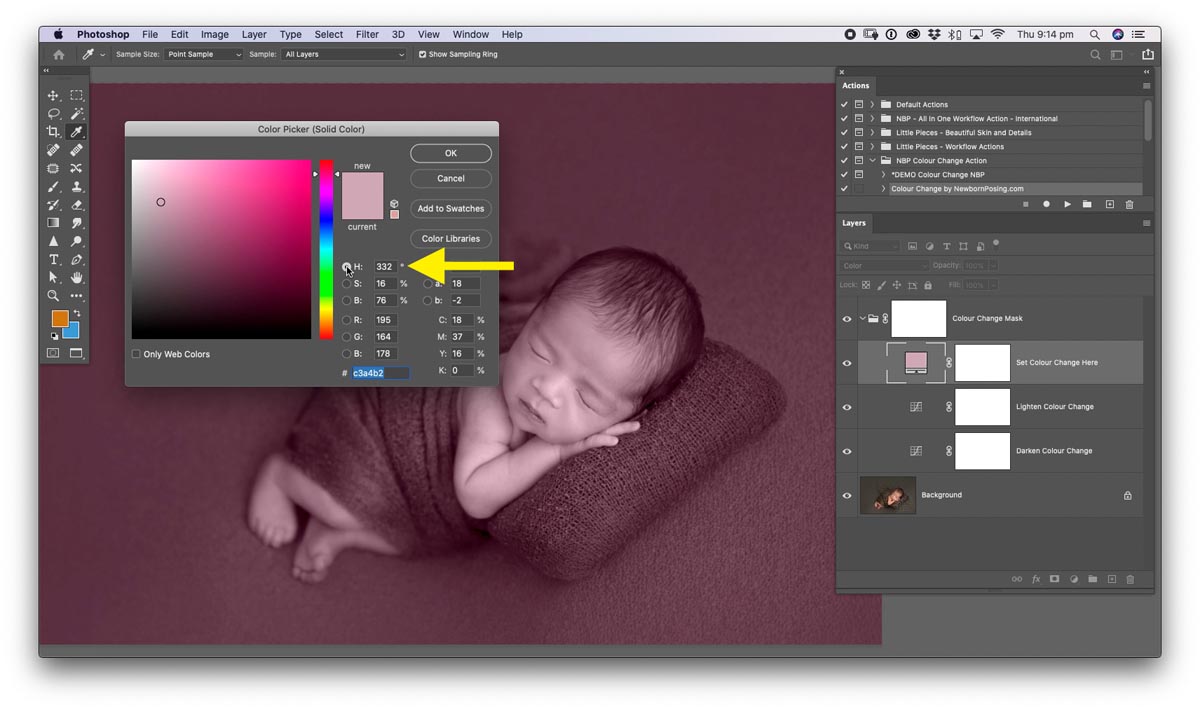
2. The Colour Picker window appears. Click H (Hue mode) for optimal control over saturation (intensity) and hue (the shade of the colour).

3. Values to the left of the colour window are low saturation, and to the right are highly saturated. Move across the colour window to choose the intensity of colour.
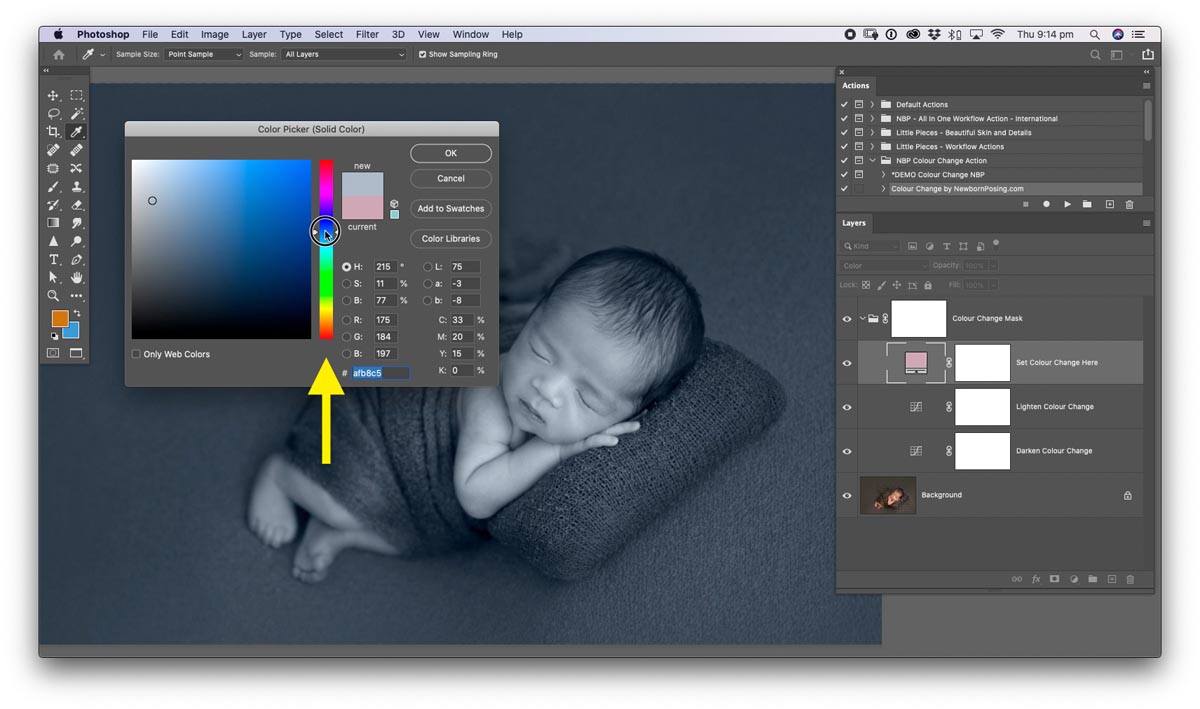
4. Use the vertical slider to choose the desired hue. Tweak these values until you are happy with the shade of colour and its intensity.
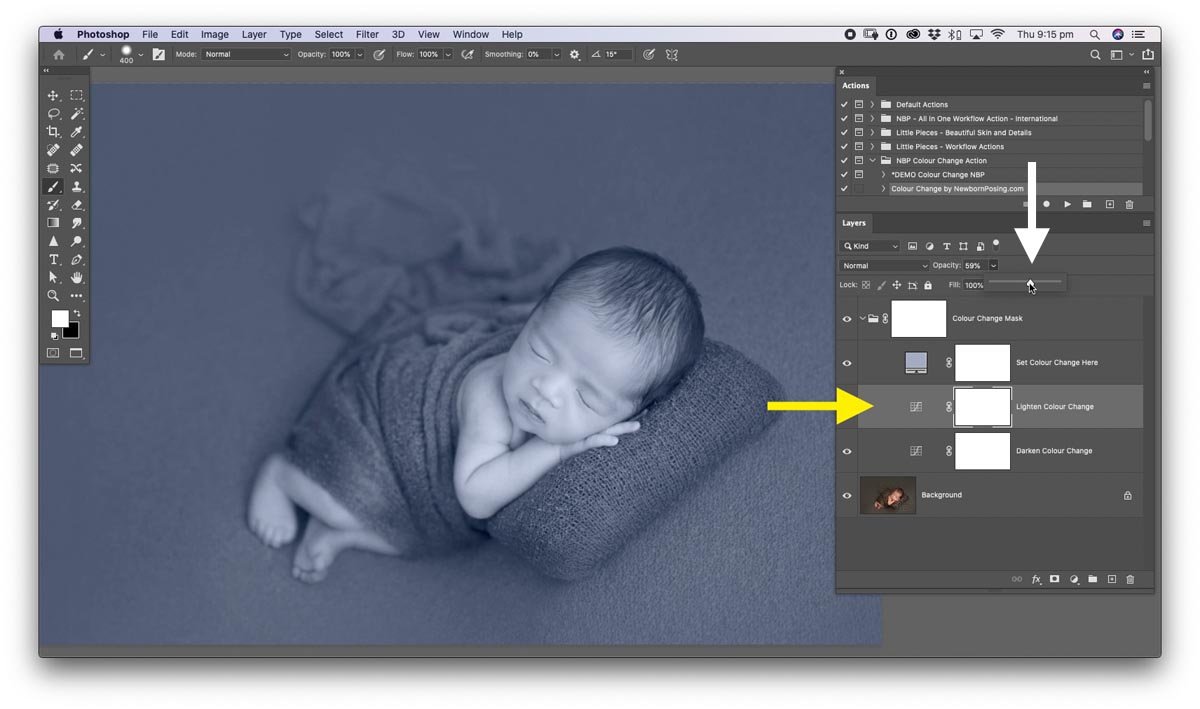
5. Additional adjustment layers have been added to allow you to brighten or darken the colour change. To lighten, select the “Lighten Colour Change” layer and increase its layer opacity (see white arrow).
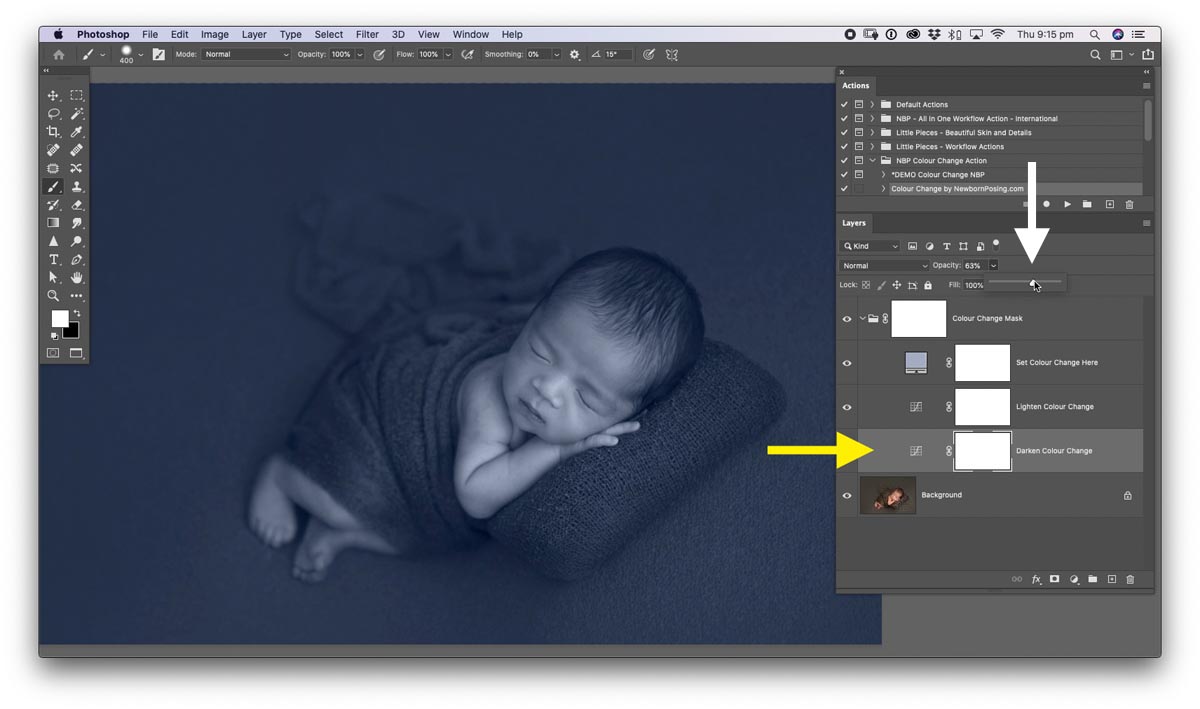
6. To darken, select the “Darken Colour Change” layer and increase its layer opacity (see white arrow).
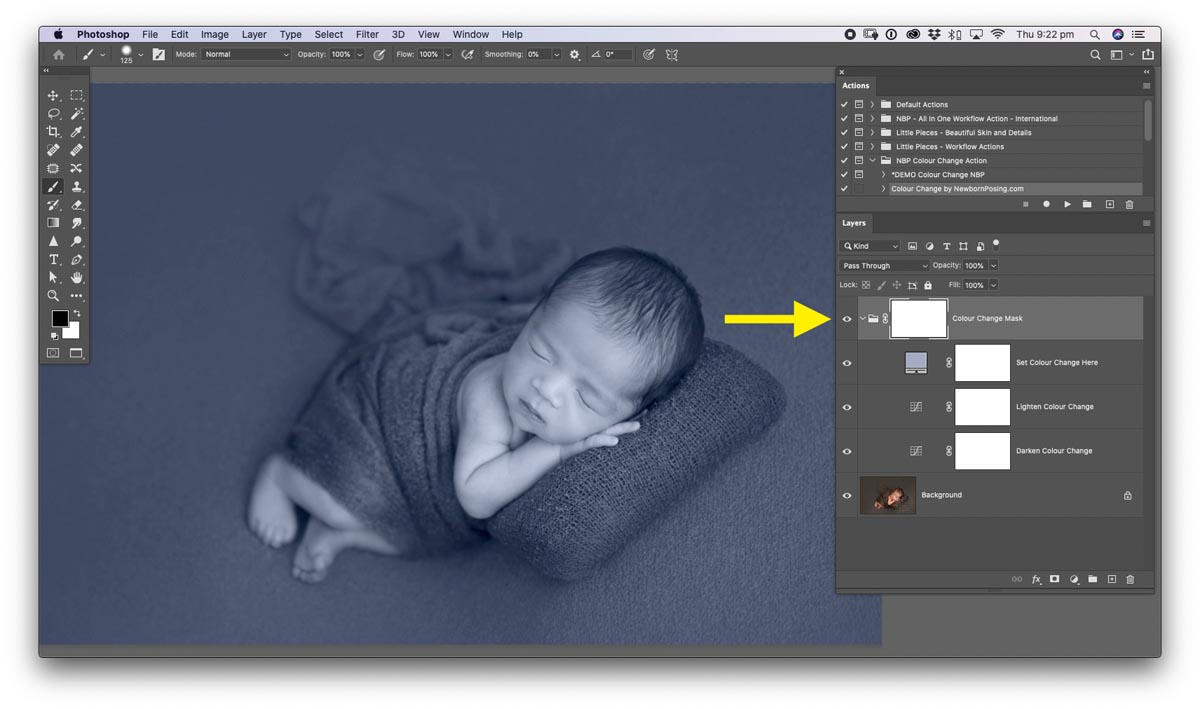
APPLY THE LAYER MASK
7. Click on the rectangular Layer Mask of the layer group to select it.
(The layer group is indicated by the folder icon, and contains the 3 adjustment layers discussed above. By working on the layer group mask, we will hide or reveal everything within the group simultaneously.)
Recall your layer mask basics. Where a mask is white, the layer (or layer group) is visible. Where a mask is black, it is hidden. If you are new to Layer Masks see this article.
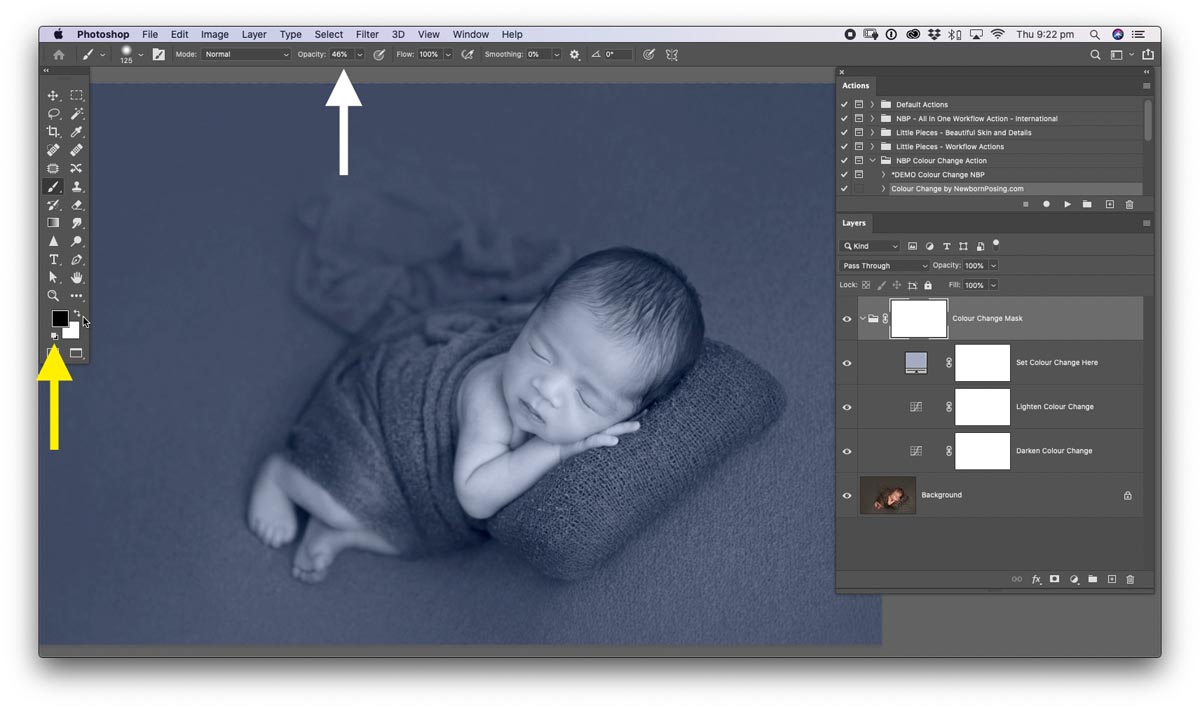
To hide an area of the colour change layer group, you’ll paint the mask black. Choose the Brush Tool and adjust its size, edge hardness and opacity (white arrow). Set your foreground colour to black (yellow arrow).
TIPS:
The keyboard shortcut to reset fore- & background to black & white is ‘D’.
The keyboard shortcut to swap foreground and background colours is ‘X’.
These are essential shortcuts when masking.
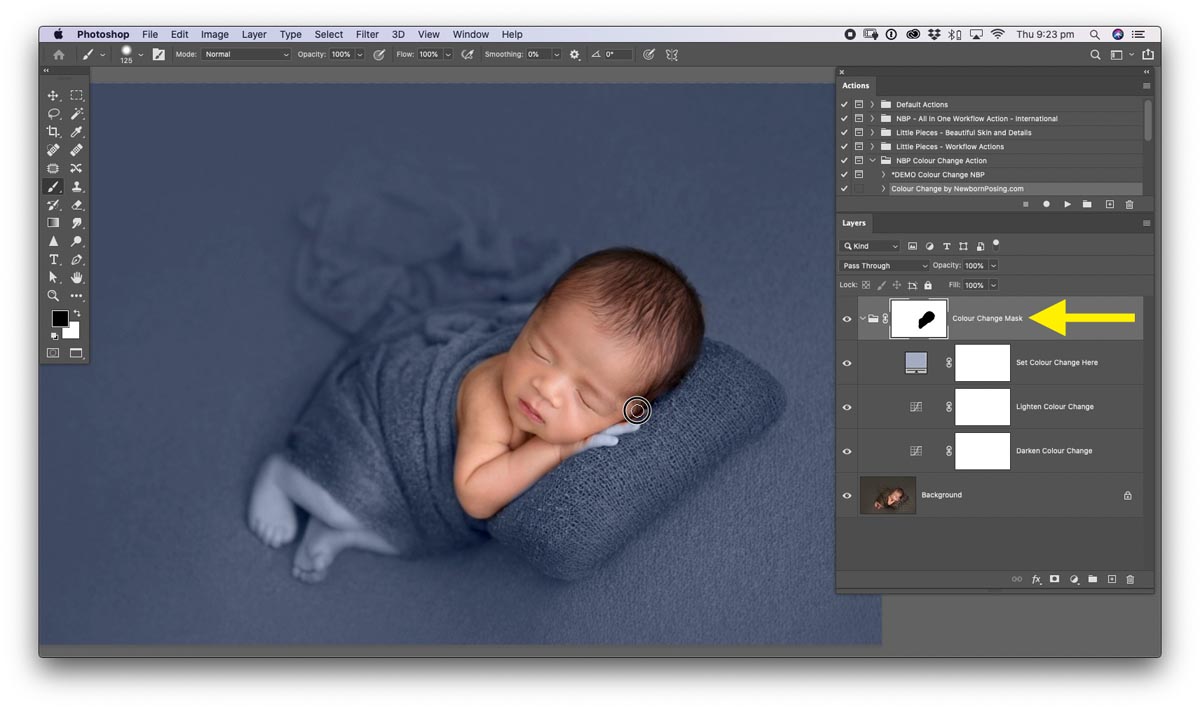
8. Paint your mask to hide the colour change layer group from the areas you don’t wish to see it appear. As you work, adjust your brush size and opacity as required to refine your selection.
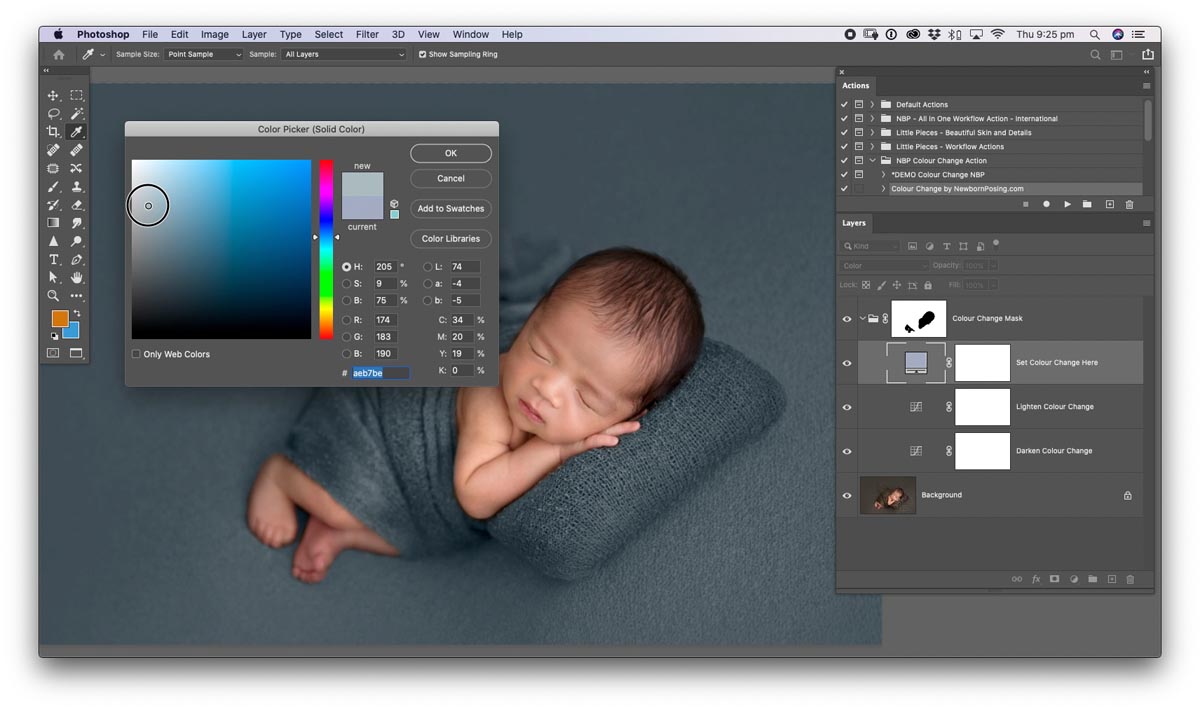
9. Once you’ve completed your masking, you may return to your colour and density adjustment layers to make further changes if required.
The possibilities are limitless.
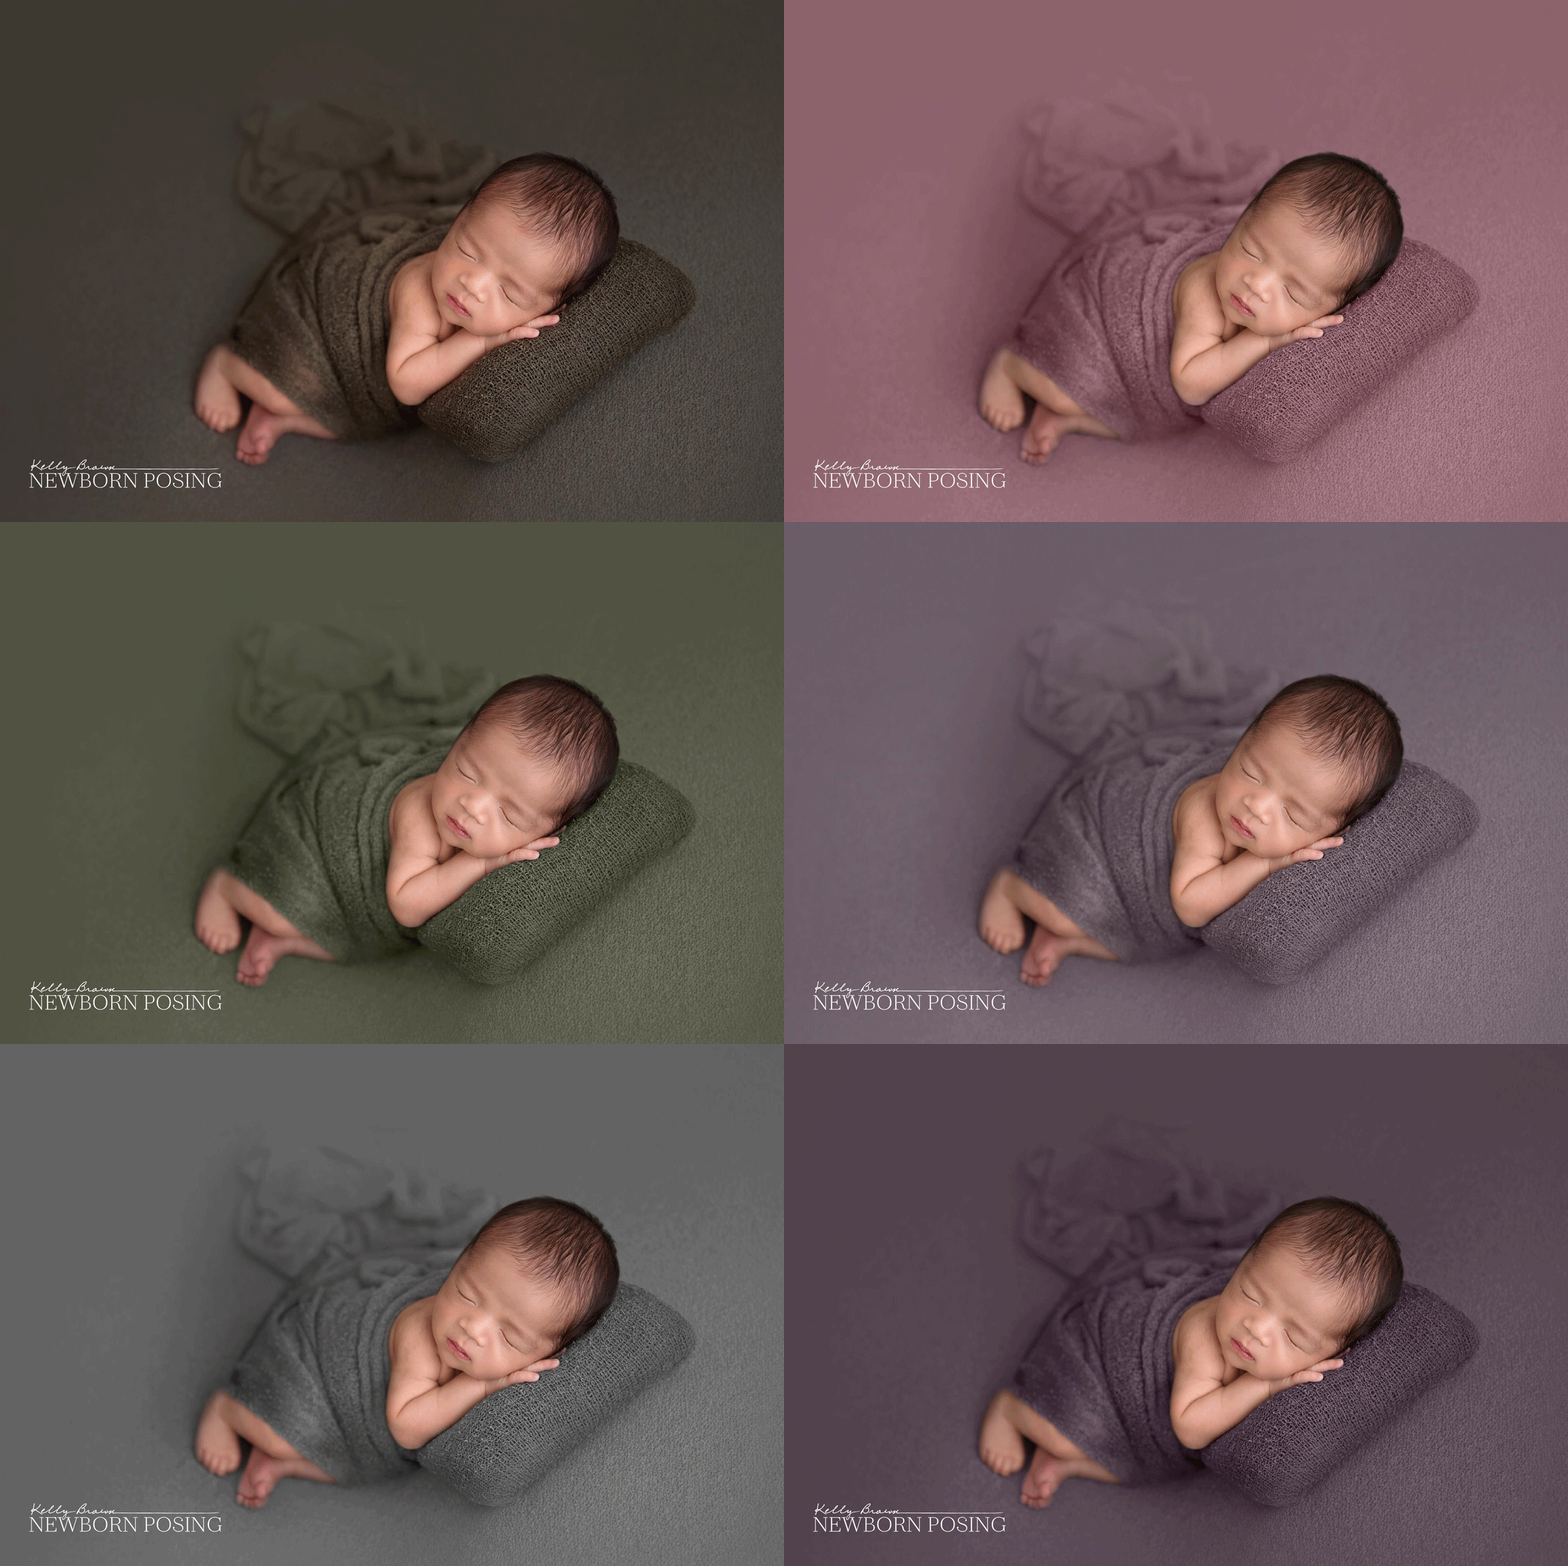
VARIATIONS OF USE
- Change the opacity of the layer group for a blend between your colour change action and the original image.
- Take your colour sample from another part of the image, or even a different image, if you wish to match that colour.
- If the area you wish to colour change is small, after running the action, select and invert the “Colour Change Mask” layer group. The shortcut is Cmd + I (Mac) or Ctrl + I (Windows). This will immediately hide the entire colour change. Set your foreground colour to white and paint on the desired area to reveal the colour change there.
- To perform multiple colour changes, run and apply the action as required, before flattening those layers. Then simply run the action again and mask a new colour change in the new areas.

SHARE YOUR WORK
Show your results from the Newborn Posing Colour Change action in Kelly Brown’s online community. If you’re not already a member, request to join!

