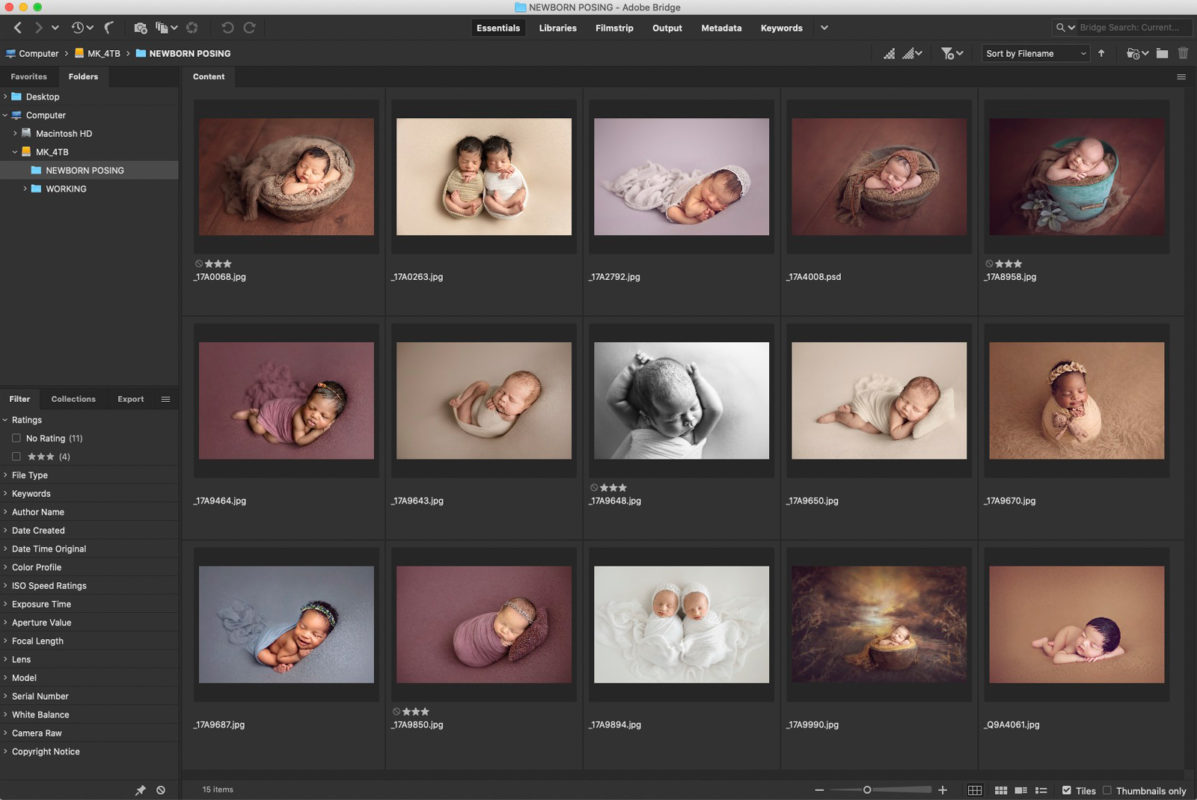
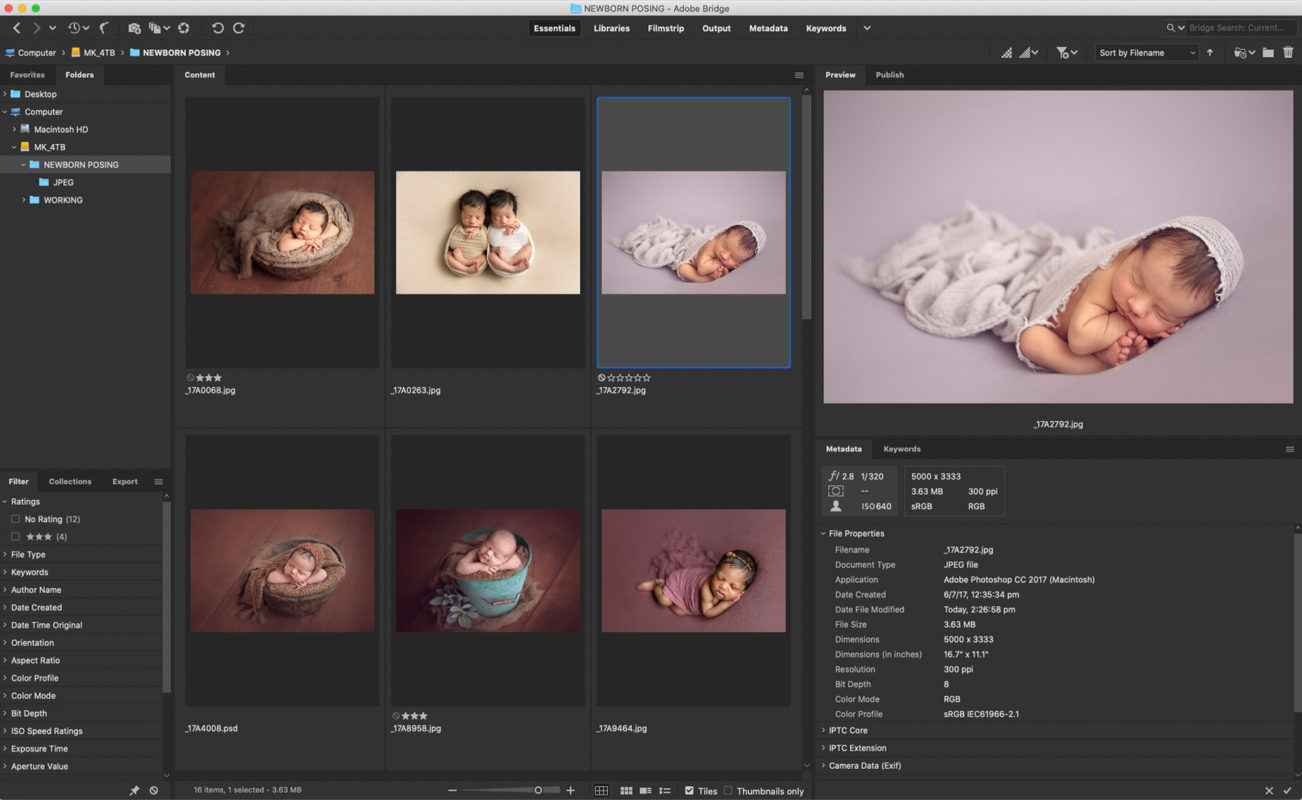
Adobe Bridge is a media file browser with digital asset management capabilities. It works alongside Photoshop and other Adobe applications to help you streamline and automate aspects of your editing workflow. It supports a wide range of file formats for still images, design files, and video.

In this article we’ll take a quick look at what Adobe Bridge offers, including a demo of its ratings and filter function.
What is Adobe Bridge?
Released in 2005, Adobe Bridge is a Photoshop companion application, now available when you subscribe to Photoshop via Creative Cloud.
After navigating to a folder of images, Bridge allows you to:
- browse
- organise
- rank
- filter
- batch process and rename
- view or add keywords and metadata
- automate processes such as image resize
- and more
In recent years, Bridge has added an Export function which we will cover in a future blog post.
In perhaps its simplest and most used role, Bridge is a convenient tool for photographers to browse and rank their images, before opening them into Adobe Camera Raw (ACR) and Photoshop, directly from the Bridge interface.
Differences between Bridge & Lightroom Classic
Unlike Adobe Lightroom Classic, Bridge is not a catalogue system. Rather than importing your images into a Lightroom catalogue, with Bridge, you simply navigate to the folder you wish to view. Aside from that, they do share a number of similar capabilities as mentioned above.
One of the main differences is that Lightroom allows you to search or filter your entire catalogue of images – which could include many years worth of your work – whereas Bridge assesses the folder you currently have selected. eg. If you want to search all of your archive for images you have keyworded with “twins”, “flowers” and “bowl”, Lightroom does a better job there.
But, if you don’t wish to maintain a catalogue of your work, or if you just want to quickly navigate to your location without waiting for files to import, then Bridge is still a powerful, no fuss, quick option. In fact, Photoshop, Bridge and Lightroom Classic, can all integrate to work together in a cohesive workflow.

Ratings and Filters in Adobe Bridge
Adobe Bridge and Lightroom both offer the opportunity to rate your images from 0 to 5 stars, or apply colour labels. You’ll decide which method (rating vs labels) works best for your needs. Once applied, you can filter to show only those with certain ratings or labels, and send that selection to various automated processes or open straight into ACR or Photoshop.
Why use Ratings & Label?
Rating and labels are similar to using a highlighter pen to draw attention to something you want to be able to find easily… with the added benefit of being able to filter to hide everything else! Here are a few ideas for how they might be useful to you:
- After downloading RAWs, apply a rating to your selected image to edit. Filter to hide the unrated images. Open the files direct from Bridge, or move the rated selection into a subfolder if that suits your workflow.
- Allocate higher ratings to your favourite images so they’re easier to find when looking for your strongest work to share online.
- Use coloured labels on your working files to indicate edits you’re happy with vs those needing revision.
- There are no rules or limits. Create a system which suits your needs.
Ratings and Labels to mark favourites
Once you have navigated to your folder of images in Bridge, you can use the star ratings or colour labels to make your selection for images you want to work with. You’ll find Labels and Ratings, and their shortcut keys under the LABELS menu in Bridge.
Filtering Images in Bridge
- After applying labels or ratings to your images, go to the Filter Panel. See the Window menu if the panel is not visible.
- In the Filter Panel, tick the properties you want to work with.
- For example, if you only want to see the images you have rated 5-star, tick the 5-star option under Ratings.
- To reveal all images again, untick your filter boxes.
Applying Ratings and Filters – VIDEO
What next?
With your images selected, you can use Adobe Bridge to:
- Open images into Photoshop or Camera Raw (see File menu);
- Drag and Drop them onto one of Bridge’s export presets (see Window > Export Panel);
- Resize and/or convert to JPG, TIFF or PSD via Tools > Photoshop > Image Processor
- Load a selection of images into layers via Tools > Photoshop > Load Files Into Photoshop Layers
- This is handy for creating animated GIFs!
- Rename your selection using Tools > Batch Rename
- and much more..
These are just some of the processes and shortcuts available when you utilise the power of Adobe Bridge. Explore the menus to see the other options which are available to help you optimise your workflow. Adobe’s Bridge support portal is accessible here, to answer more of your queries:

