Changing colours in Photoshop is a handy way to get more diversity in your photos. Once you learn how to change the colour of objects in Photoshop you can use it to add creative flair, or to match or modify the colour of outfits and props – which is a great money saver!
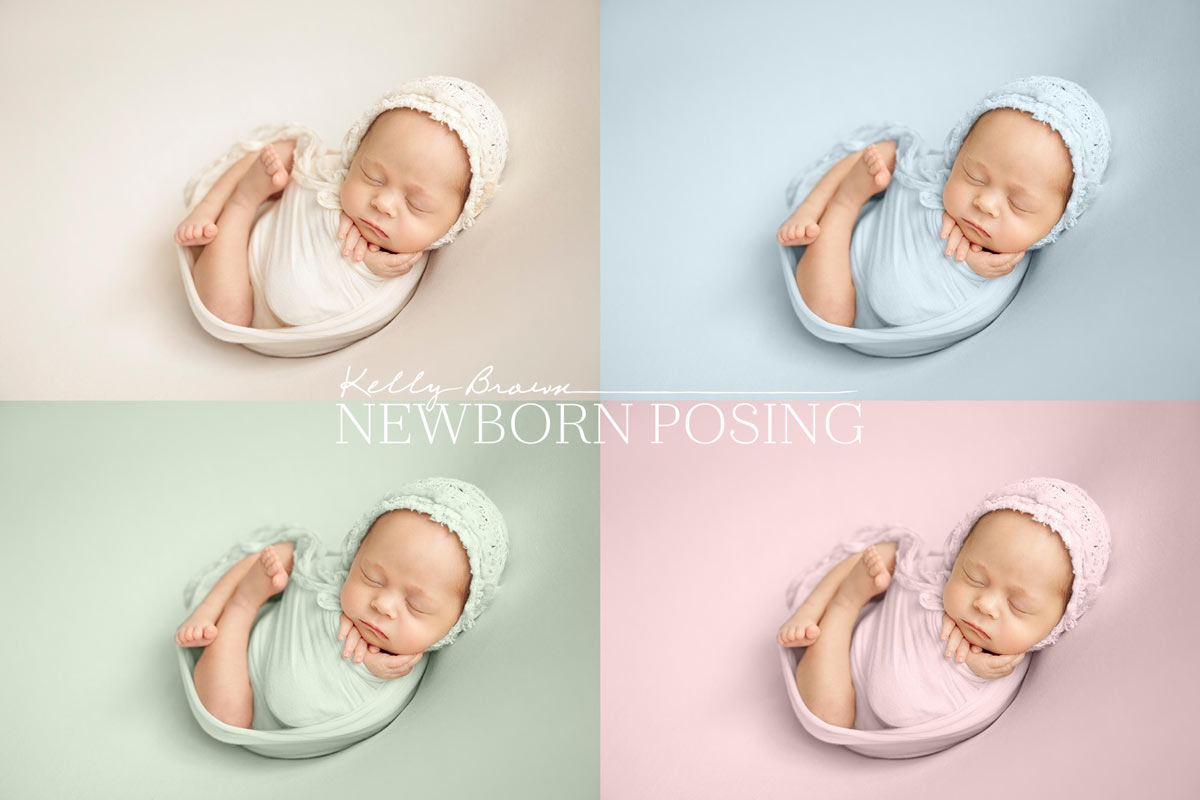
The Newborn Posing Colour Change Action allows you to modify hue, saturation AND density, to produce a broad range of results.
But it’s still important to note that colour changes have limitations, so here are some tips to help you get great results, quickly!
PHOTOSHOP COLOUR CHANGE TIPS
- Choose props/outfits with a similar brightness level to your ideal end result.
- As a general rule, an item that falls in the mid-tones (ie. closer to the middle of the tone curve) is ideal to use for maximum variety.
- Once you’ve finished, check for mismatching colour casts from the original item/s.
- Note that white is difficult to change easily and seamlessly, given its lack of density. And significant changes to white often look unrealistic.
We’ll break these tips down below.

Best Choices for Seamless Changes
Choose props/outfits with a similar brightness level to your desired end result.
Extreme changes to brightness – for example, expecting to turn cream into dark blue – are more likely to lead to banding and quality issues. The change is often quite obvious.
If you want to change a background to pale pink, choose a lighter colour item in your original capture – something on the lighter end of 50% brightness – for best results.
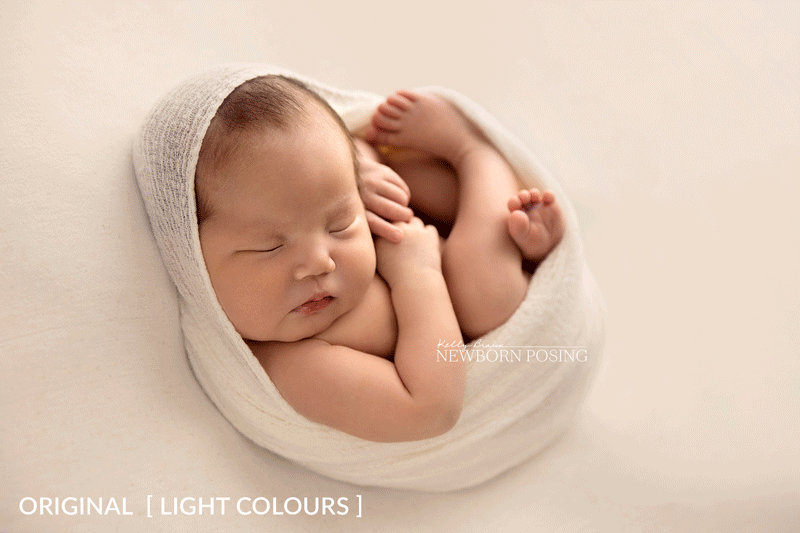
In the example above, as the image is darkened from the original beige, the edit becomes less realistic. We could improve this by adding more contouring and shadows to complement the colour change. However, if we started by photographing darker objects, the result would be more seamless and take less time.
Maximise Variety – Begin with a mid-density prop/outfit
As a general rule, an object that falls in the mid-tones is ideal to work with. (Mid-tones simply means around half way between black and white).
It will allow you a greater latitude of changes, both lighter and darker than the original, before you see quality issues.

In the example above, photographing a mid-toned backdrop and outfit allowed for significantly lighter and darker colour changes, quickly.
Check for Colour Casts
Once you’ve finished changing colours, check for mismatching colour casts.
For example, a vibrant green backdrop may reflect a green cast on baby’s skin, which would become more visible after the colour change.
Where possible, choose neutral grey or warm brown / beige items which are less likely to throw casts onto the subject’s skin. They’re an ideal choice of colour for the object you are intending to change in Photoshop.
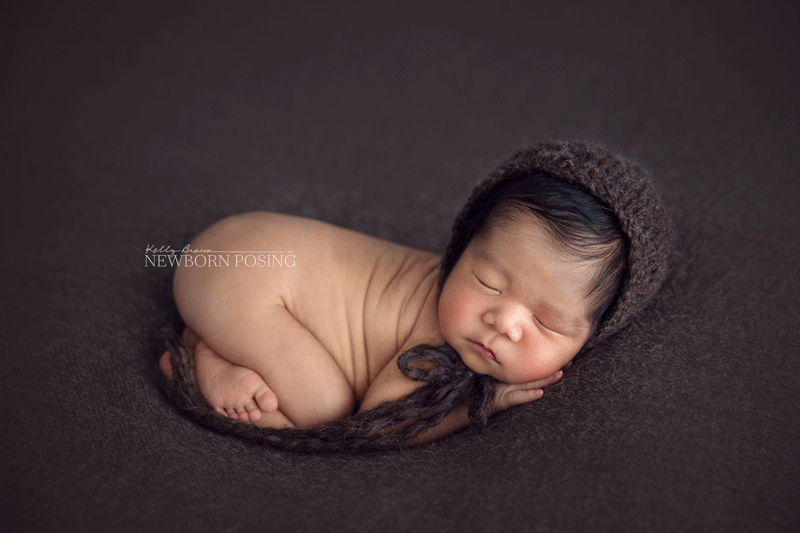
This original image was the dark brown, allowing us to create many changes of colour and density.
COLOUR CHANGE ACTION INCLUDES VIDEO TUTORIAL
When you purchase the Colour Change Action, you’ll find a bonus video tutorial in your NewbornPosing library. Whether you’re new or experienced in Photoshop, it will guide you through each of the variables in the action, giving you complete control.
This video demonstrates:
- installation of your action into Photoshop
- selecting colour hue and saturation, and applying the density adjustments
- getting the most out of your action
- use of brushes and masks which are essential for accurately applying your edit

CUSTOMISE YOUR ACTION: When working with the Newborn Posing Colour Change Action, you may wish to customise the density adjustments. While we have created presets to best suit the majority of images, you may wish to make custom changes to density and contrast. To do so, simply create your own Levels or Curves adjustments inside the action group to best suit your image.
MORE RESOURCES
New to Photoshop Actions?
See How to Use Photoshop Actions
Errors or trouble loading Photoshop Actions?
See Photoshop Actions FAQs
Using Layer Masks in Photoshop
See How to Use Layer Masks
New to Photoshop?
Find out more from Adobe.