Lightroom Classic accepts a range of different types of presets. Develop presets apply predefined styles to change the look of your image, globally. Local Adjustment presets load a section of styles which you can paint on to selected areas of your image. Lightroom also has presets for Export preferences, metadata and more. Each of these preset types must be loaded into the correct location in order for them to become active in Lightroom.
NOTE: This article refers to Lightroom Classic. Lightroom for Mobile operates differently and most presets are not compatible between the 2 applications. Kelly Brown’s LR Collection is design for Lightroom Classic only.
LOCATING THE PRESETS FOLDER
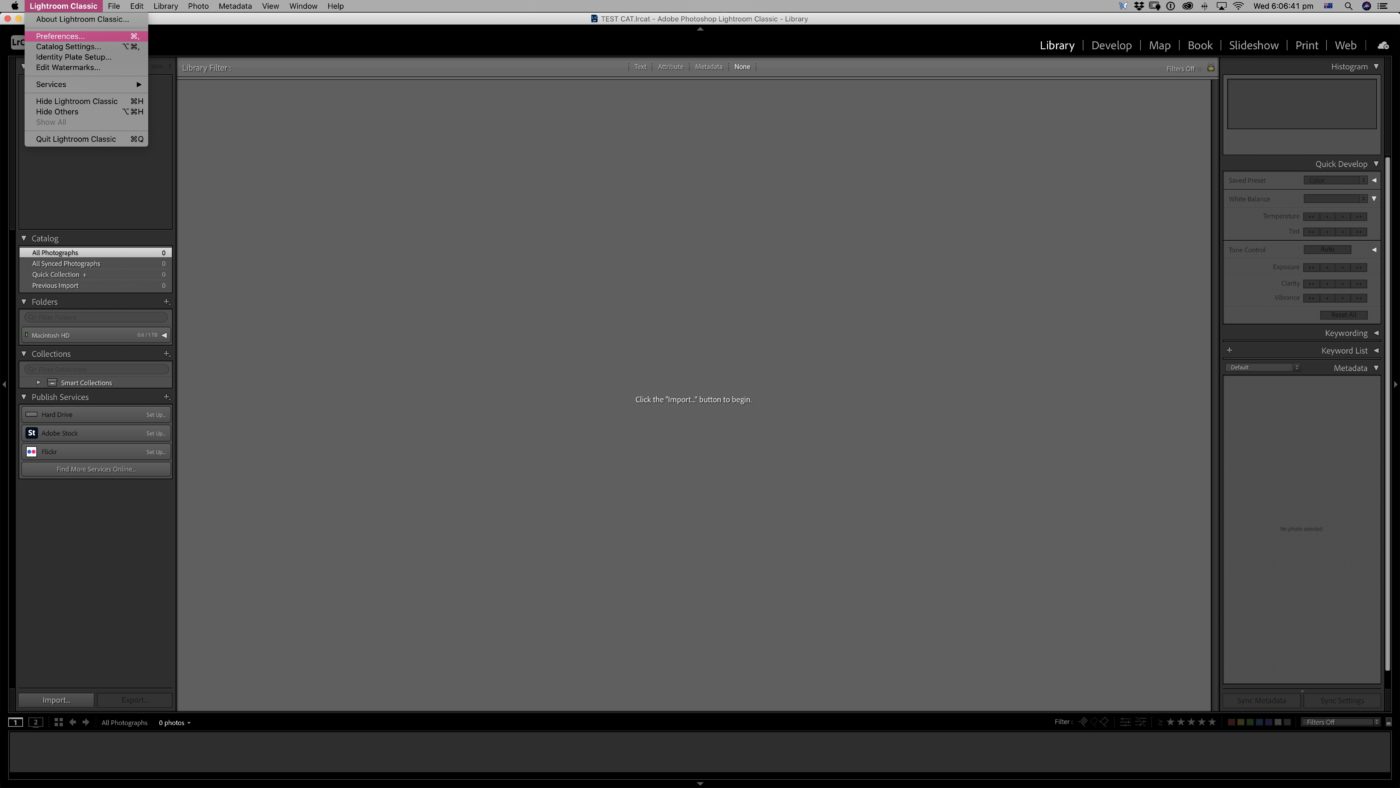
- The easiest way to locate your Lightroom Presets folders is through the Preferences menu. LIGHTROOM CLASSIC > PREFERENCES
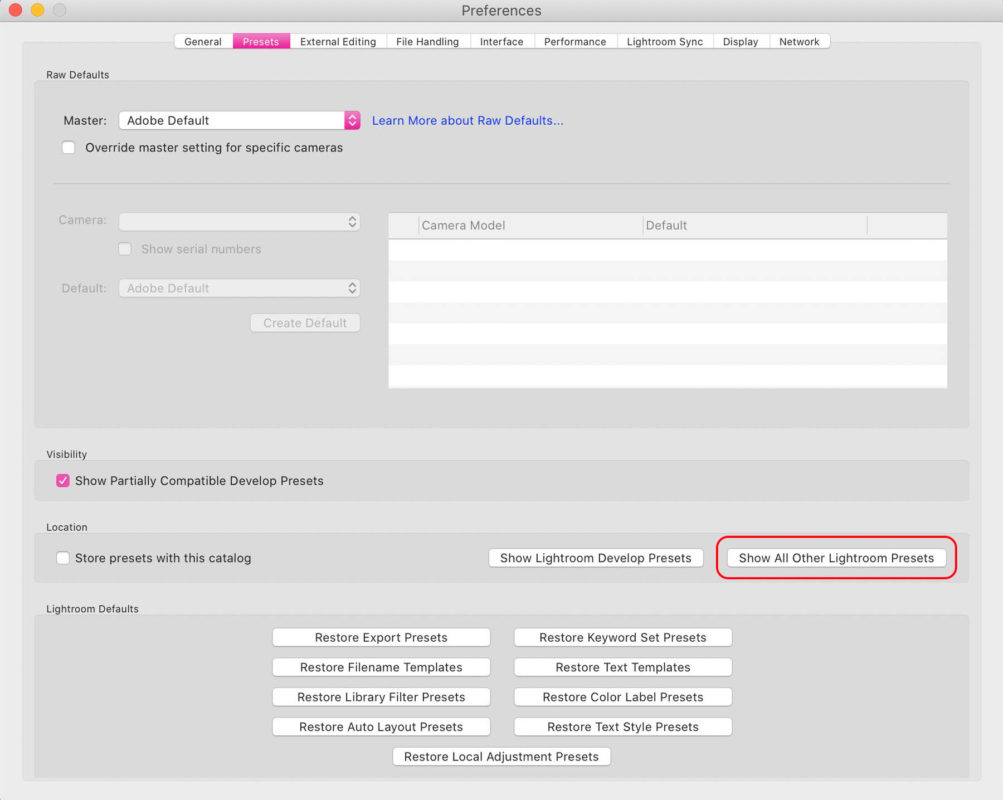
- Select SHOW ALL OTHER LIGHTROOM PRESETS
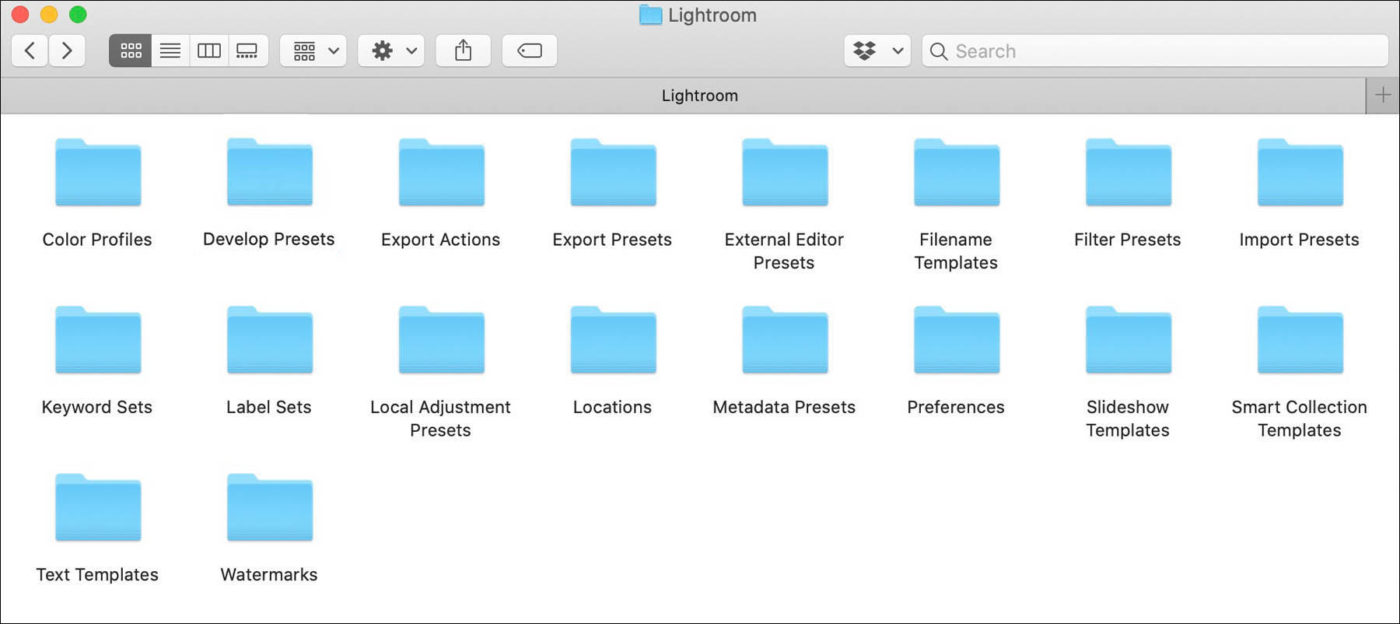
- This will reveal a folder, named LIGHTROOM. The subfolders of LIGHTROOM reflect the range of different preset types, as mentioned at the start. You must move the correct presets into the correct location in order for them to activate.
LOADING DEVELOP PRESETS
- Download and unzip your Lightroom preset files.
- Windows Users: If you see a folder named __MACOSX when you unzip, ignore it. Read more.
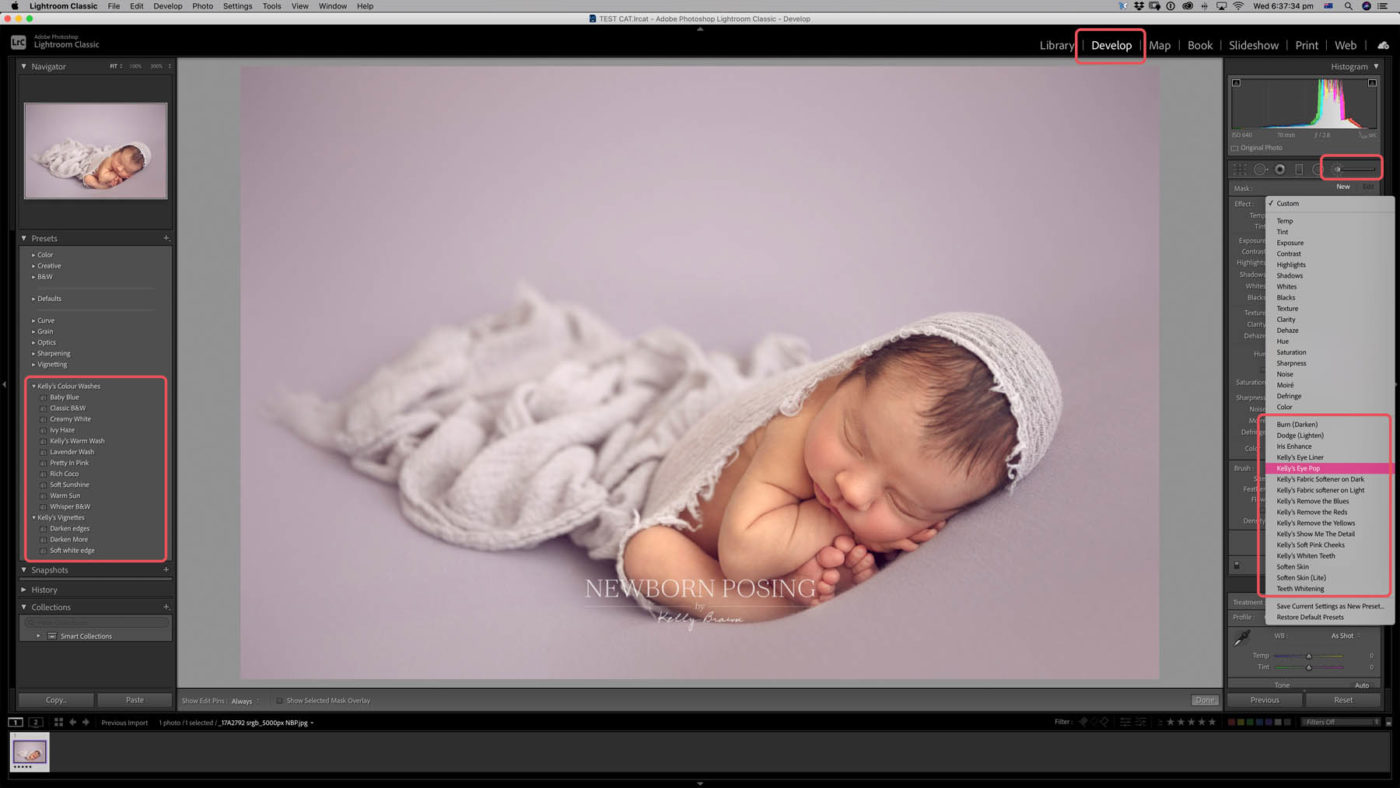
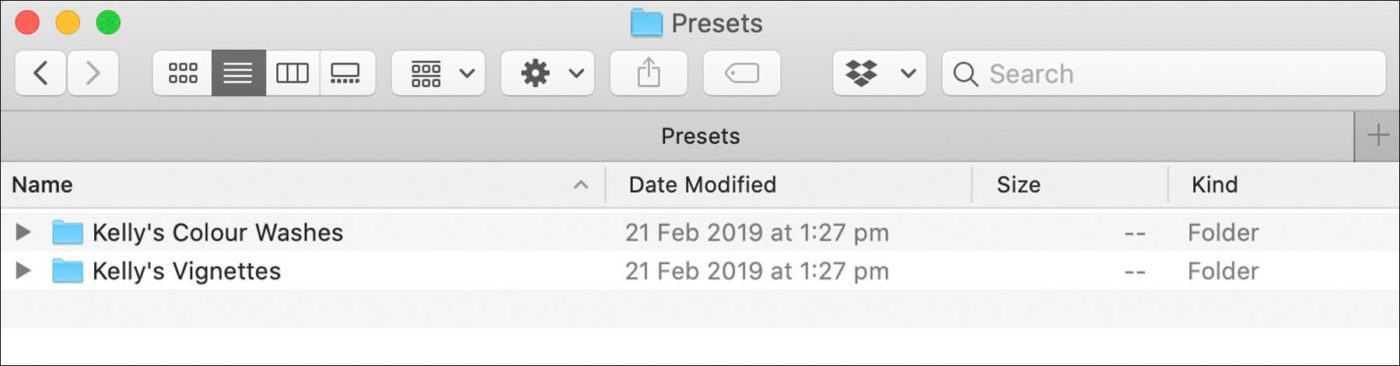
- Kelly Brown’s Lightroom Collection contains 2 Develop Sets – Colour Washes, and Vignettes, plus a Brush Set for local adjustments.
- Each type must be installed in a different location.
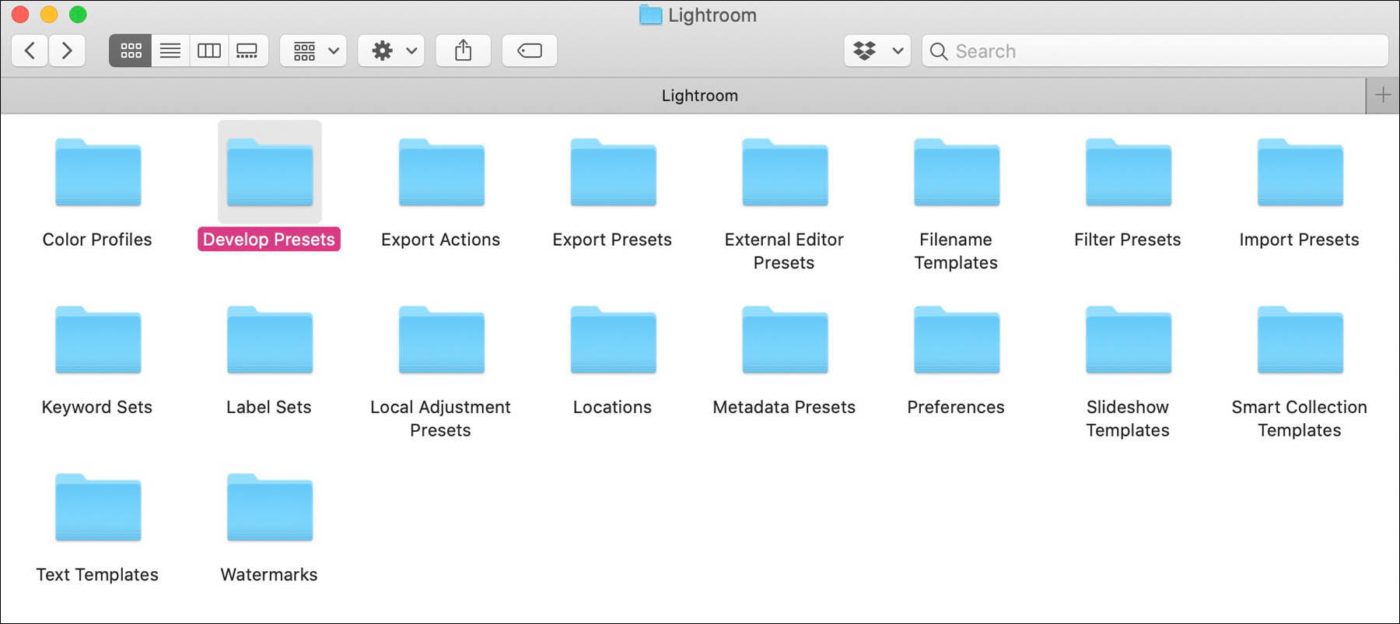
- To install Develop Presets, open the Lightroom > Develop Presets folder.
- Copy the “Kelly’s Colour Washes” and “Kelly’s Vignettes” folders into the Develop Presets folder.

LOADING LOCAL ADJUSTMENT (BRUSH) PRESETS

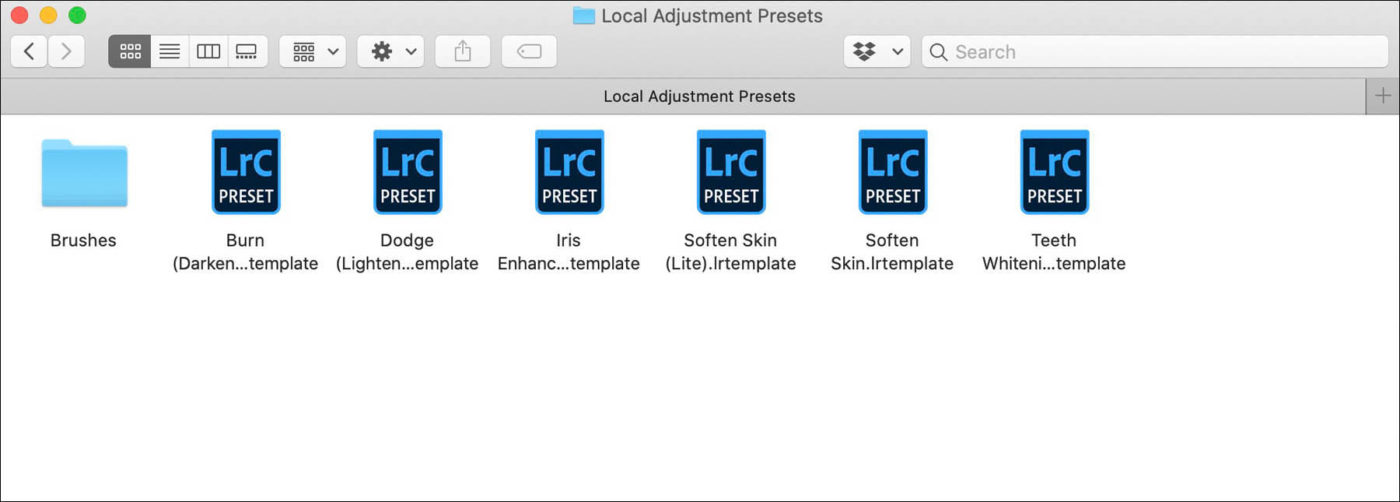
- To install Local Adjustment Presets, open the Lightroom > Local Adjustment Presets folder.
- Copy the “Brushes” folder into the Local Adjustment Presets folder.
- You will see the folder sitting alongside Lightroom’s default local adjustment files.
RESTART TO ACTIVATE PRESETS
- Once you have copied the files into their appropriate location, restart Lightroom Classic to allow them to be activated.
- When you restart you will find the Develop Presets and Local Adjustments in the Develop module.